Setting up Email Marketing
DailyStory makes use of modern email security features to ensure email is delivered on time and placed in the inbox. This includes setting up a dedicated subdomain to send emails from, separate from a customer's main domain.
DailyStory requires you add several DNS records so that DailyStory can send your email using a subdomain, such as ds.example.com. This is done so that when email is sent on your behalf, email recipients can validate that the email comes from you.
These records include SPF and DKIM records that allow for email servers to validate the sending domain and the from address. While you don't need to understand what SPF or DKIM records are, we do provide additional documentation explaining them in more detail.
ImportantSetting up DNS records for SPF and DKIM is required. You will not be able to send email until this is complete.
Follow the instructions below to set up your domain and add the appropriate records to your DNS.
RecommendedPlease contact us if you would like us to set up your DNS records for you. We would be happy to do so.
Add your Email Domain
Navigate to Account Settings > Email Settings and enter the domain that you own and want to send emails from:
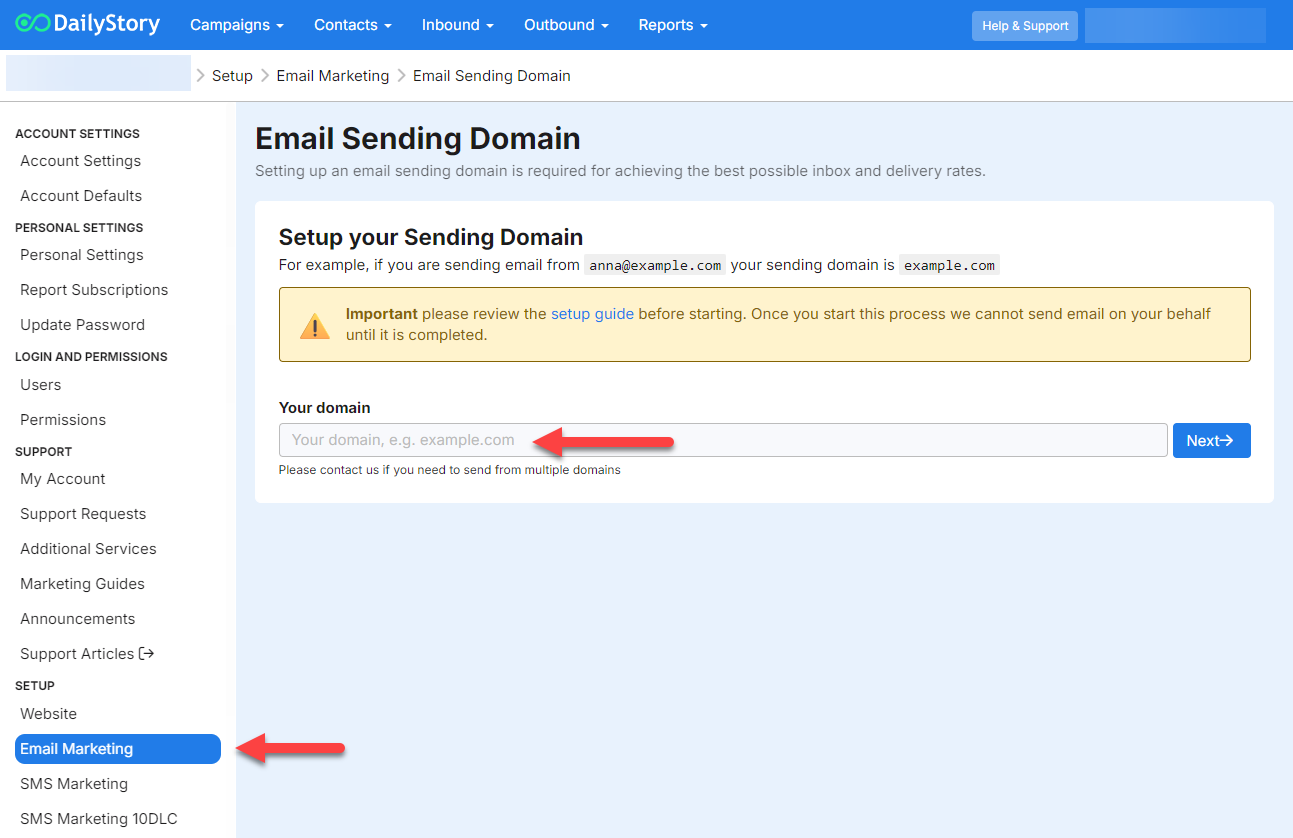
You do not need to use a subdomain, DailyStory will automatically configure your email to be setup on a subdomain.
If you do not own a domain, you will need to purchase one. We recommend either Namecheap or GoDaddy.
Once you enter the domain, click next.
Review Email Sending Domain DNS Records
After entering your domain, the next screen will show the domain records:
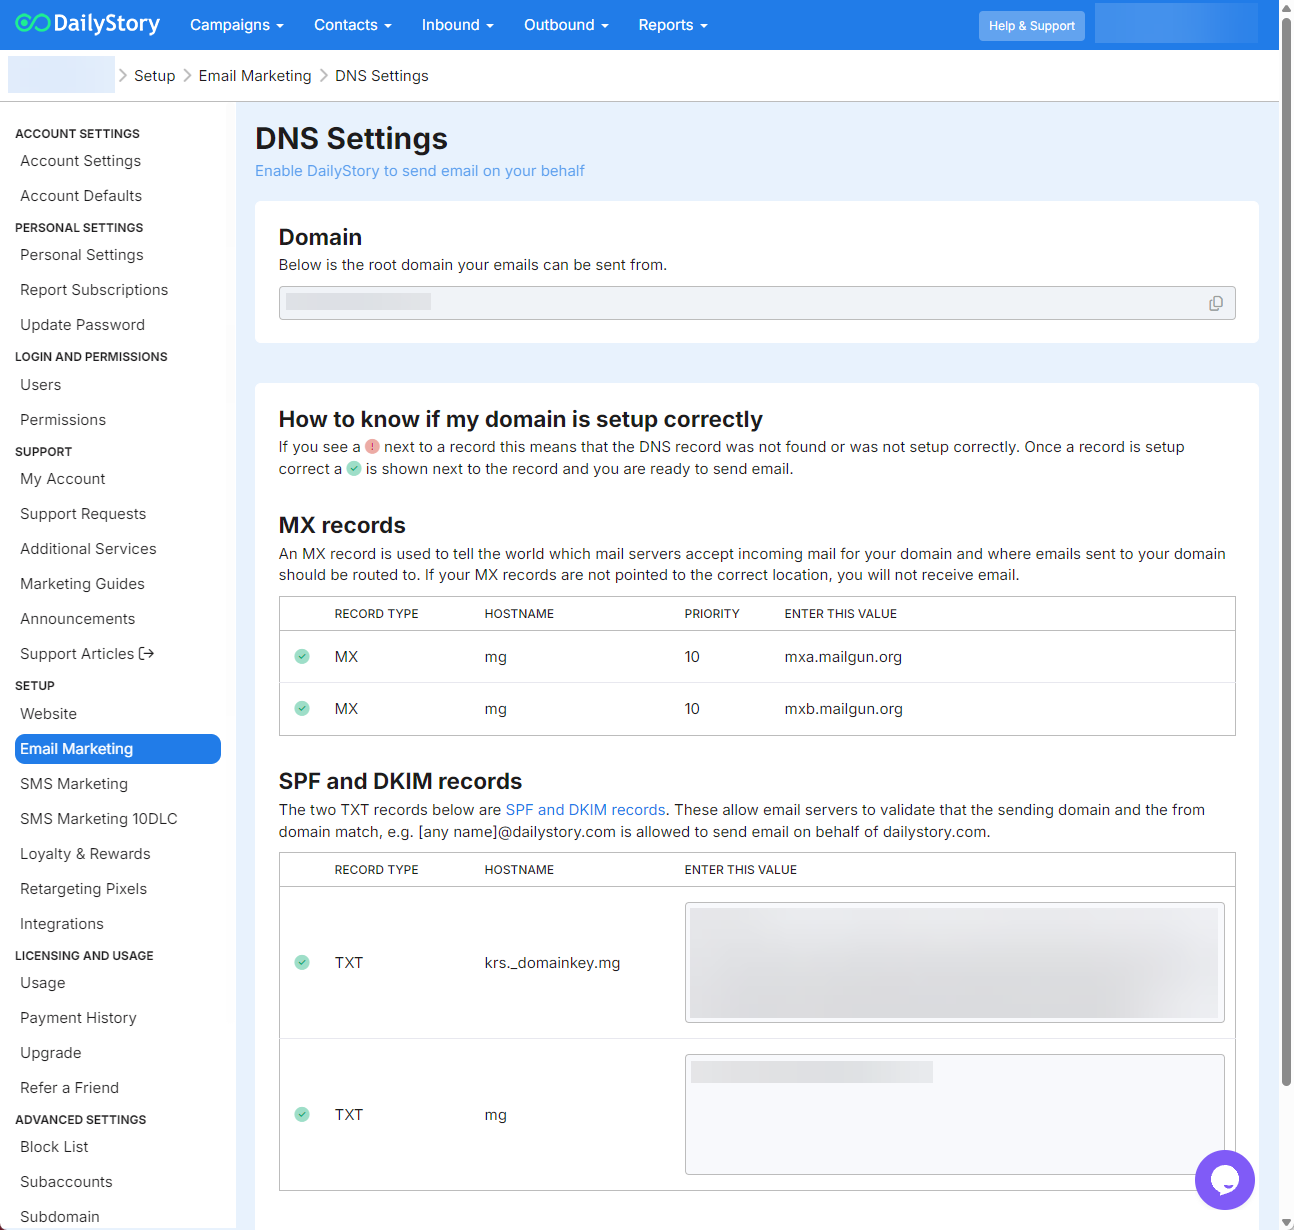
You will need to add these records to your DNS for your domain. Typically, this is where you purchased your domain, such as GoDaddy.
Download a DNS Zone File
Below the DNS records screen you'll find a Download Zone File button. Clicking this button will download a the txt Zone File. A Zone File is a plain-text document that contains a complete map of all the DNS records for a specific domain or subdomain (like ds.yourdomain.com). In this case, it contains the "identity" and "permissions" your domain needs to send email through DailyStory's infrastructure.
What is a DNZ Zone file used for?
- Bulk Configuration: Instead of manually typing in five or six individual records, many DNS providers (like Cloudflare, AWS Route 53, and others) allow you to "Import" this file to configure everything at once.
- Error Prevention: Email authentication records like DKIM and DMARC contain very long, complex strings of characters. Copying and pasting these individually often leads to errors (like accidental line breaks or missing characters). This file ensures the syntax is perfect for a BIND-compatible server.
- IT Handoff: This file serves as a standardized "Instruction Sheet" that you can send to your IT department or web developer. They will instantly recognize the format and know how to apply it to your domain's hosting account.
Enter Domain Records with your DNS provider
Your DNS provider is where you registered your domain. For example, if your domain is example.com and you created that domain on GoDaddy, you would edit the DNS record in GoDaddy.
For example, here are how several records look in a customer DNS for GoDaddy:
 Warning
When you enter a record, only use the Hostname portion, e.g. ds or pic.domainkey.ds. Unless specified by your domain provider, you do not need to enter the full domain, e.g. ds.example.com when setting up your records.
DNS Documentation
Below are some links to common DNS providers' documentation on DNS records:
- GoDaddy
- NameCheap
- Network Solutions
- Rackspace Cloud DNS
- Amazon Route 53
- Digital Ocean
Validate your DNS records
Once you have added the entries to your DNS, the records should be updated within 20 to 30 minutes and sometimes much sooner.
There are two ways you can check if your records are set up correctly:
Validate within DailyStory
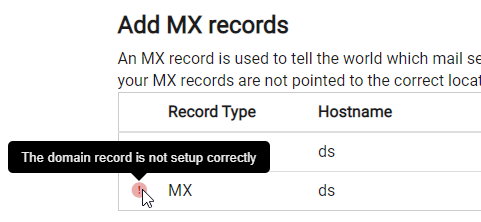
Navigate to Account Settings > Email Marketing and view the DNS records.

If the DNS records are not set up correctly you'll see a red X with a tooltip. This indicates that the DNS record was either not found or set up incorrectly:
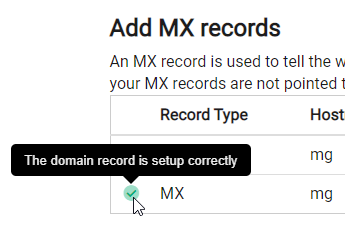
When the DNS record is set up correctly, you'll see a green check with a tooltip:
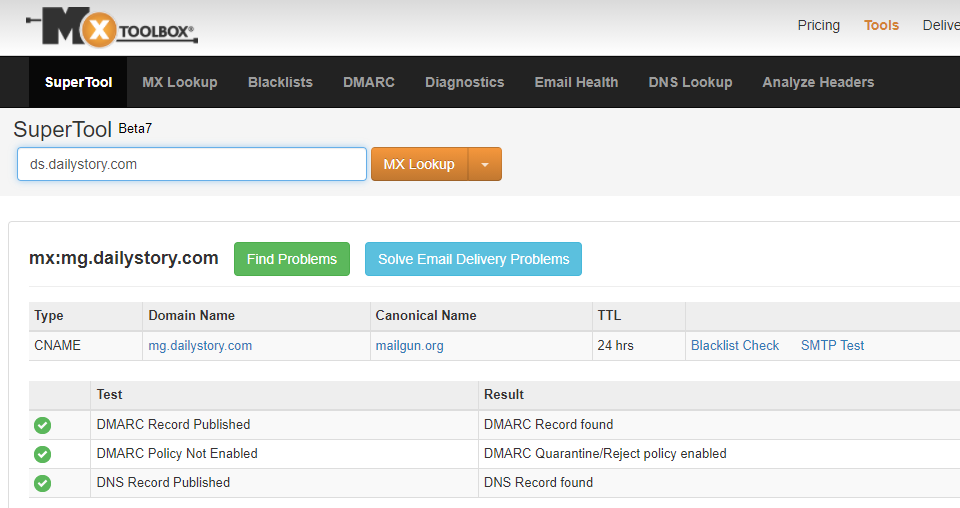
Validate with MX Toolbox
MX Toolbox is a free and commercial tool that you can use to validate your email DNS records.
Go to mxtoolbox.com and enter your domain. If you set up the domain example.com, enter ds.example.com:
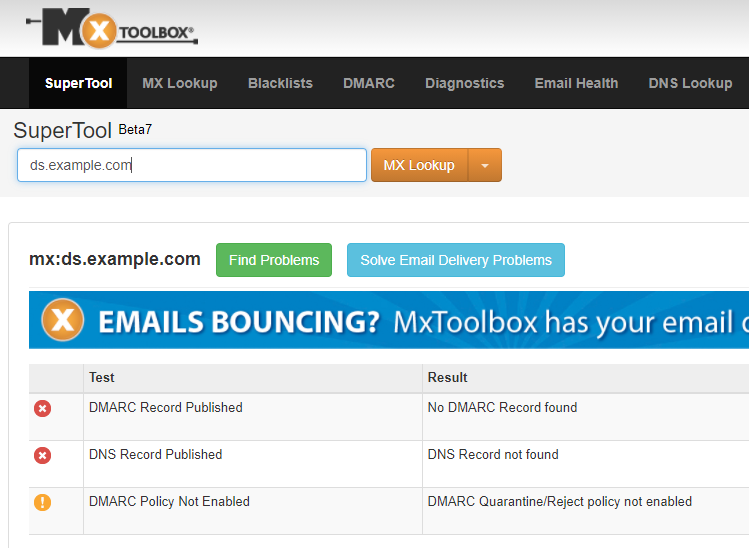
When set up incorrectly, MX Toolbox will show green checkboxes next to your records:
Frequently Asked Questions
Below are some frequently asked questions about setting up email marketing.
Can I send email from my @gmail email address?
No, sending emails or replies from an @gmail.com address is discouraged. While possible, the email is almost guaranteed to land in the spam/junk folder.