Web Push Optin Popup
To send Web Push notifications to your website visitors and customers you first need to opt-in those visitors and customers.
Web push notifications is a powerful tool to help you share timely information. However, it requires the recipient to "opt in" to receive notifications. And, unfortunately, once someone opts out it is very difficult to get them to opt back in.
DailyStory uses a double opt-in strategy to ensure that if visitor or customer declines to opt in, they can be prompted to opt in again in the future.
Why double optin?
Web Push notifications rely on a user granting the permission for you to send them web push notifications. This is done through the browser.
For example, the screenshot below shows the optin popup shown by Google Chrome:
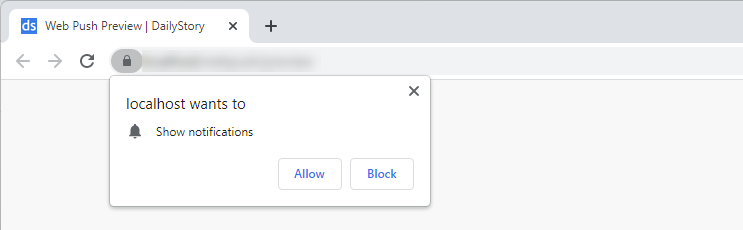
You've likely seen these before when browsing the Internet. And likely you clicked "Block".
Once "Block" is clicked this popup cannot be shown again to the visitor. Unless they go through the steps to re-enable web push notifications.
Double optin popup strategy
The problem with the default browser popup is that it cannot be customized and therefor provides no context to the visitor as to why they should optin.
DailyStory uses a customizable popup that is shown to the visitor before showing the browser popup:
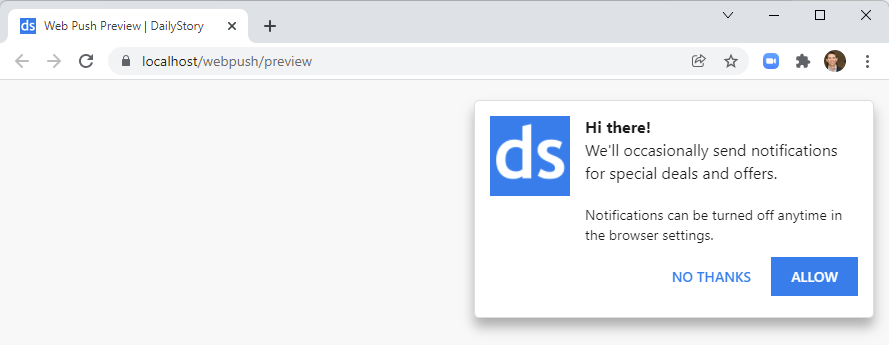
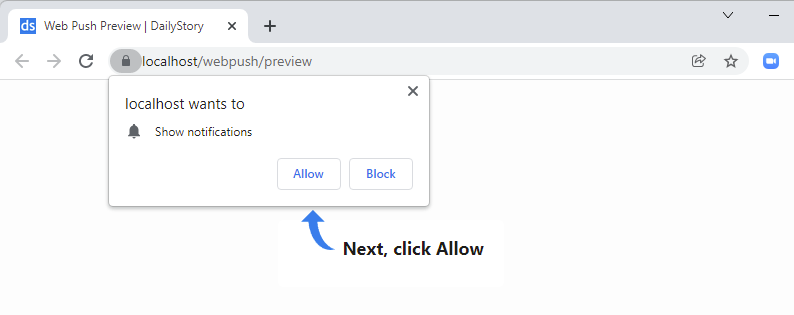
If the visitor clicks allow, then the browser's popup is shown:
However, if the visitor clicks "No Thanks" then the customizable popup is hidden and an attempt to optin the visitor can take place again in the future.
Edit the Optin Popup
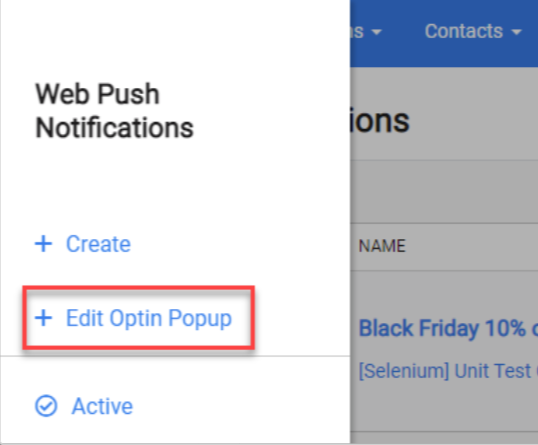
To edit the Optin Popup for Web Push Notifications, navigate to Content > Web Push. From the hamburger menu click Edit Optin Popup:
This opens the edit web push optin screen:
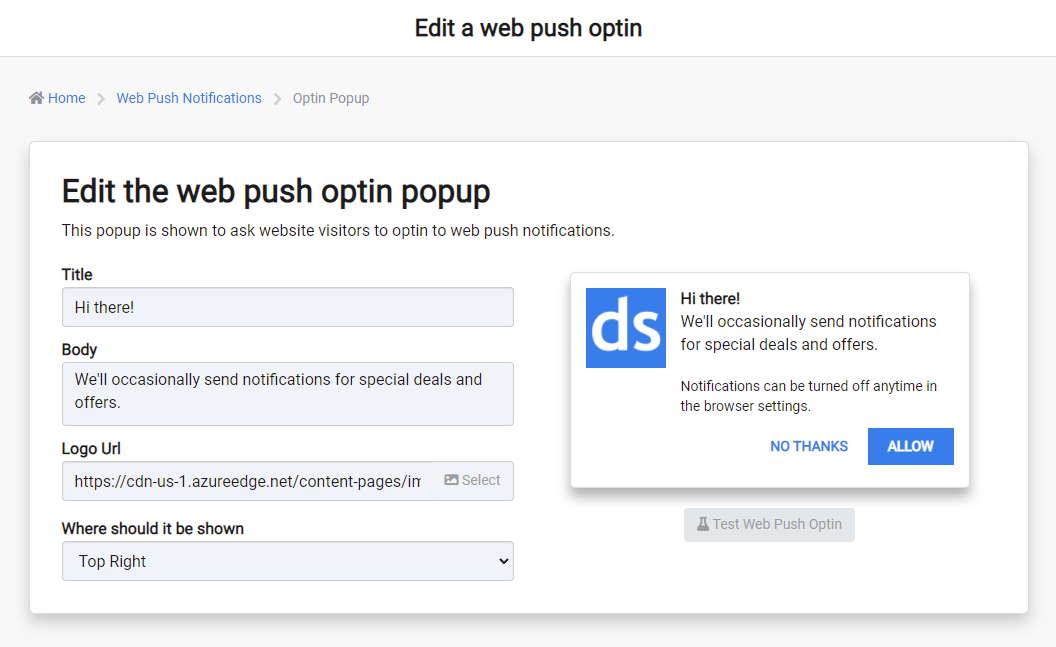
From the screen you can specify the title, body and logo URL for the optin popup. The location for where the popup is shown can also be set. Finally, the Test Web Push Optin button can be used to preview what the experience is like for a visitor.
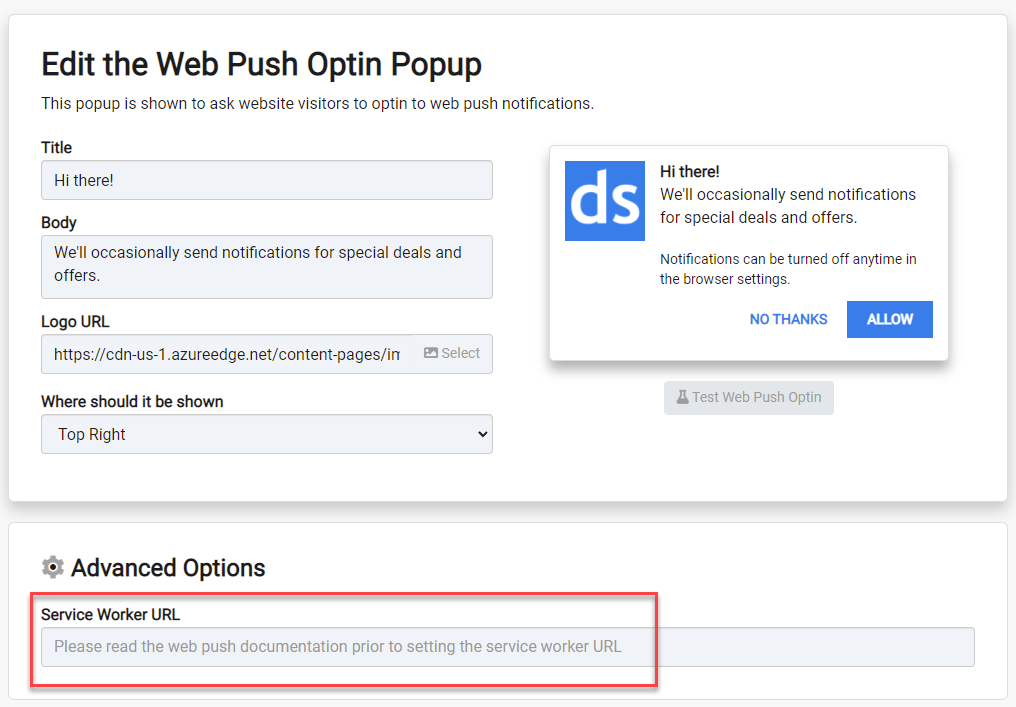
Service Worker URL
If you are not running WordPress and are not using the most up-to-date version of the DailyStory WordPress plugin (version 1.1.5 or greater) you will need to manually install some JavaScript on to your site to use web push notifications.
Manually add the Service Worker JavaScript
Web Push notifications make use of JavaScript service workers. The JavaScript for the service worker must reside on the same domain that the web push notification functionality is used for. Installing the DailyStory WordPress plugin does this automatically.
You can get the latest version of the service worker JavaScript here.
1. Copy the contents from the link above and save as dailystory_sw.js
2. Upload dailystory_sw.js file to your web server
3. Ensure that the dailystory_sw.js file is accessible via a public URL
4. Enter the URL in the Web Push Optin Advanced Settings and save the Web Push Optin form.
Frequently Asked Questions
Below are some frequently asked questions about the Web Push Optin.
Can I change the text of the buttons?
No, the button text is not editable. We may consider allowing this in the future, but also need to provide a consistent user experience.
Can I remove the boiler plate notification text?
The popup contains the text "Notifications can be turned off anytime in the browser settings." This text cannot be edited or removed.
Can I set the service worker URL to the URL hosted by DailyStory?
No, a service worker JavaScript file must be hosted on the domain that the service worker is running for.