Step 6: Send your first campaign
Campaign Starter
Campaigns are a cornerstone feature of DailyStory. Everything in DailyStory is associated back to a campaign. Think of campaigns as the house for all your marketing assets.
Once you create a new campaign, you'll be ready to send your first message.
RecommendedFor step-by-step guidance on creating some of our most popular campaigns, see our Help Section: Build Popular Campaigns.
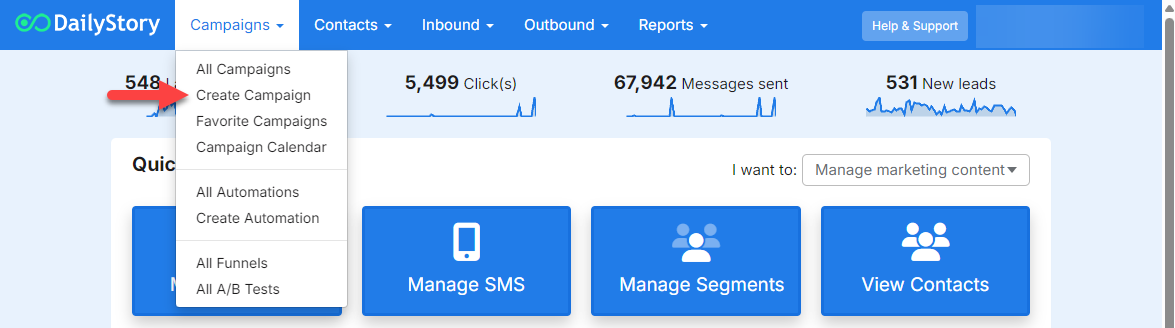
Create a Campaign
On the Campaigns drop-down menu, select Create Campaign:
Configure the Campaign
To create a campaign, enter a campaign name:
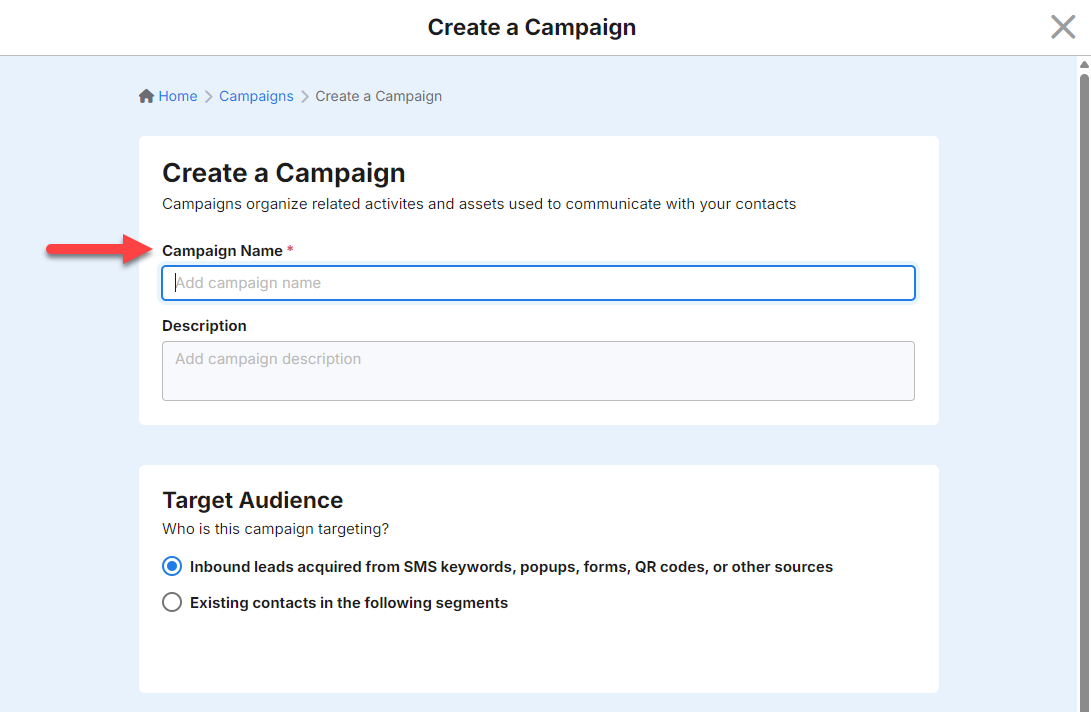
While there are other option for setting up your campaign, this is all you need to get started.
Add Segments to the Campaign
While not required, you can also add segments to the campaign. This will pre-configure the campaign for outbound marketing which can be targeted to those segments.
RecommendedYou can add multliple segments to a campaign. Which segments you assign to a campaign determines the segments available when you schedule your messages in the campaign, as you will see in more detail below.
For a more detailed explanation on campaigns, their settings and types of segments, see the different articles in the Campaigns section.
Campaign leads
Simply put, leads are customer records (contacts) associated with a campaign.
When a contact from your system is in a campaign, we call that contact a lead. And, it is possible for a contact to be in multiple campaigns at the same time. For example, a new customer campaign, a newsletter campaign, and a webinar campaign.
Leads that are created by submitting forms, or through other inbound channels, will show up in your campaign's inbound leads list:

Create your First Outbound Message
To add an email or a text message, click on the Assets tab and then click on + Create new and select and email or text message:
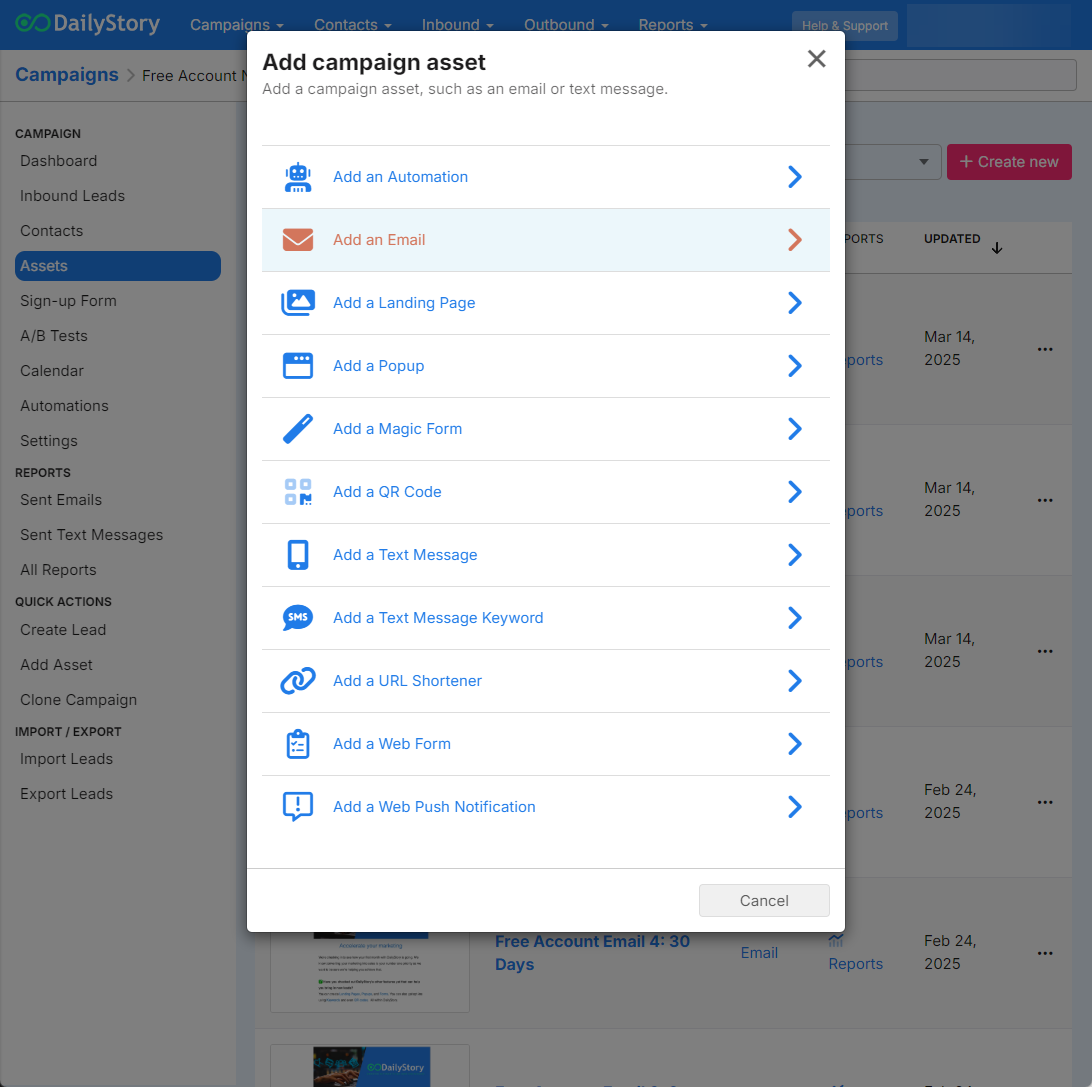
For more detailed help with emails and text messages, see our sections on Email Marketing and SMS Marketing.
Schedule your First Message
Scheduling your messages will become a familiar screen, whether you are sending email or text messages.
First, click on the Schedule button from the bottom of your email or text message page:

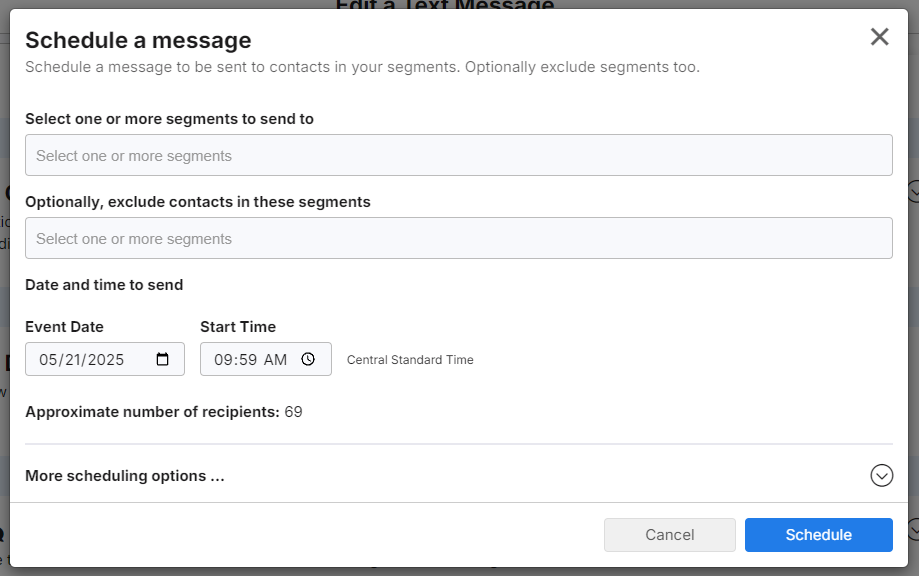
Select Recipients and Send Date / Time
Choose who you want to receive the message from the list of segments you assigned to the campaign:
For more information on scheduling, see our articles Scheduling an Email and Sending Text Messages.
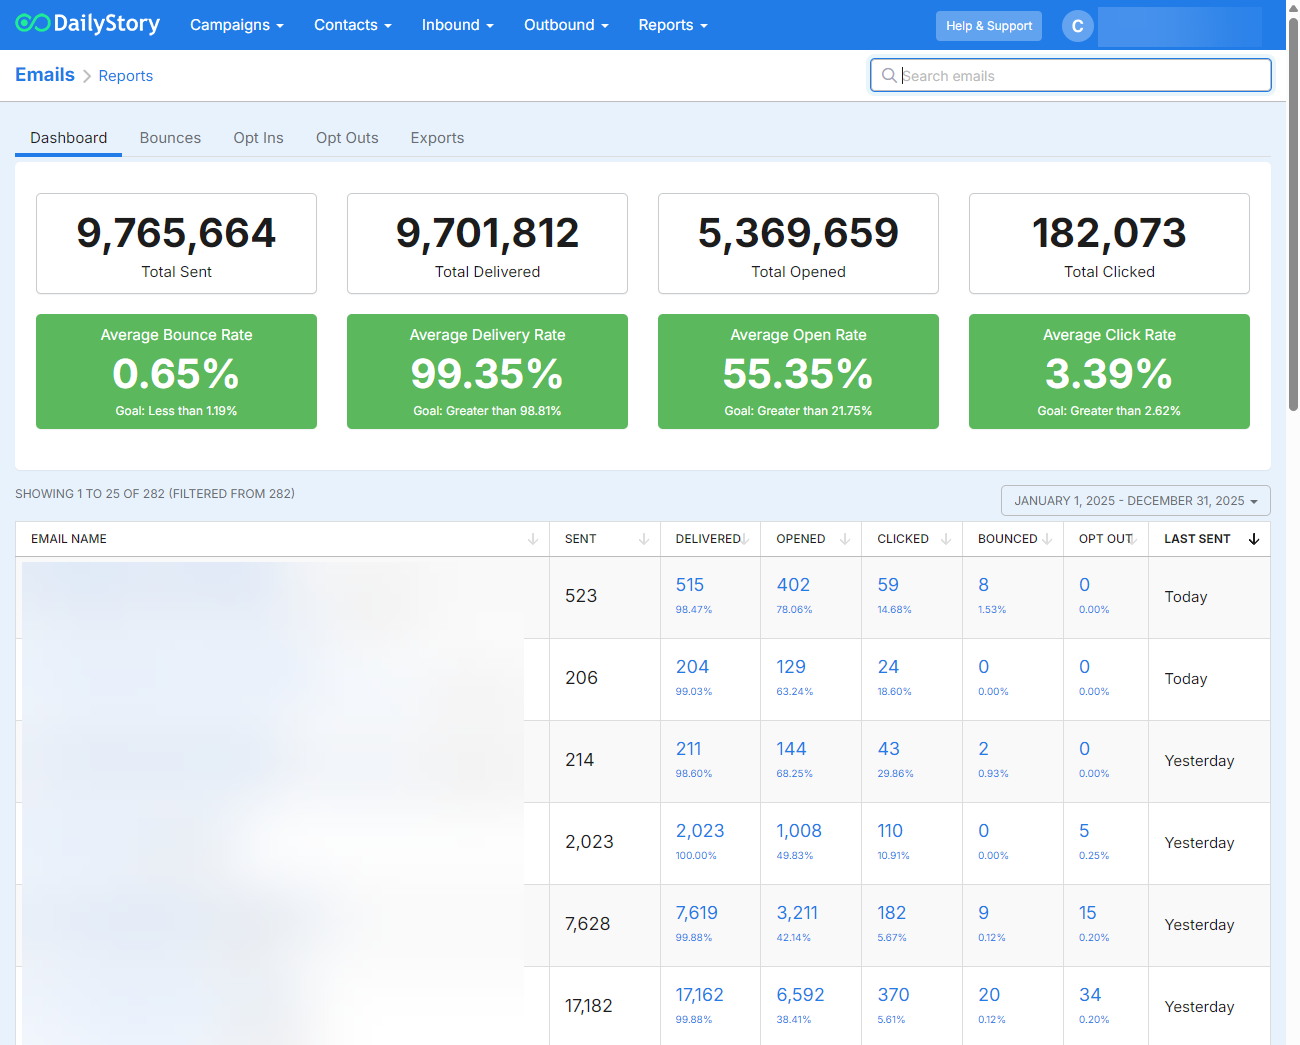
View Results in Reporting
To see the reporting metrics for your email or text messages, navigate to the reporting sections.
From here you can view dashboards and lists of various reports. See all articles for reports in our Reports section.