Referral Campaign
Show your customers you appreciate their referrals with a simple drip campaign. We'll walk you through an easy way to set up an automation so you can 'set it and forget it!'
Please note, in order to utilize this campaign/segment you have to be collecting the data field for whatever you want to celebrate (i.e. first product purchase, becoming a member, etc.).
Steps we'll guide you through:
- Determining your audience and creating a segment
- Creating a campaign
- Creating your marketing piece(s): referral texts or emails
- Automating your communication
STEP 1: Determine your audience and create a segment
- In this example, we're going to make our audience anyone who completes a purchase (ie: their most recent purchase at your business). To find these contacts based on our criteria, we're going to search for them and then create a dynamic segment. Go to
Contacts > Search Contacts

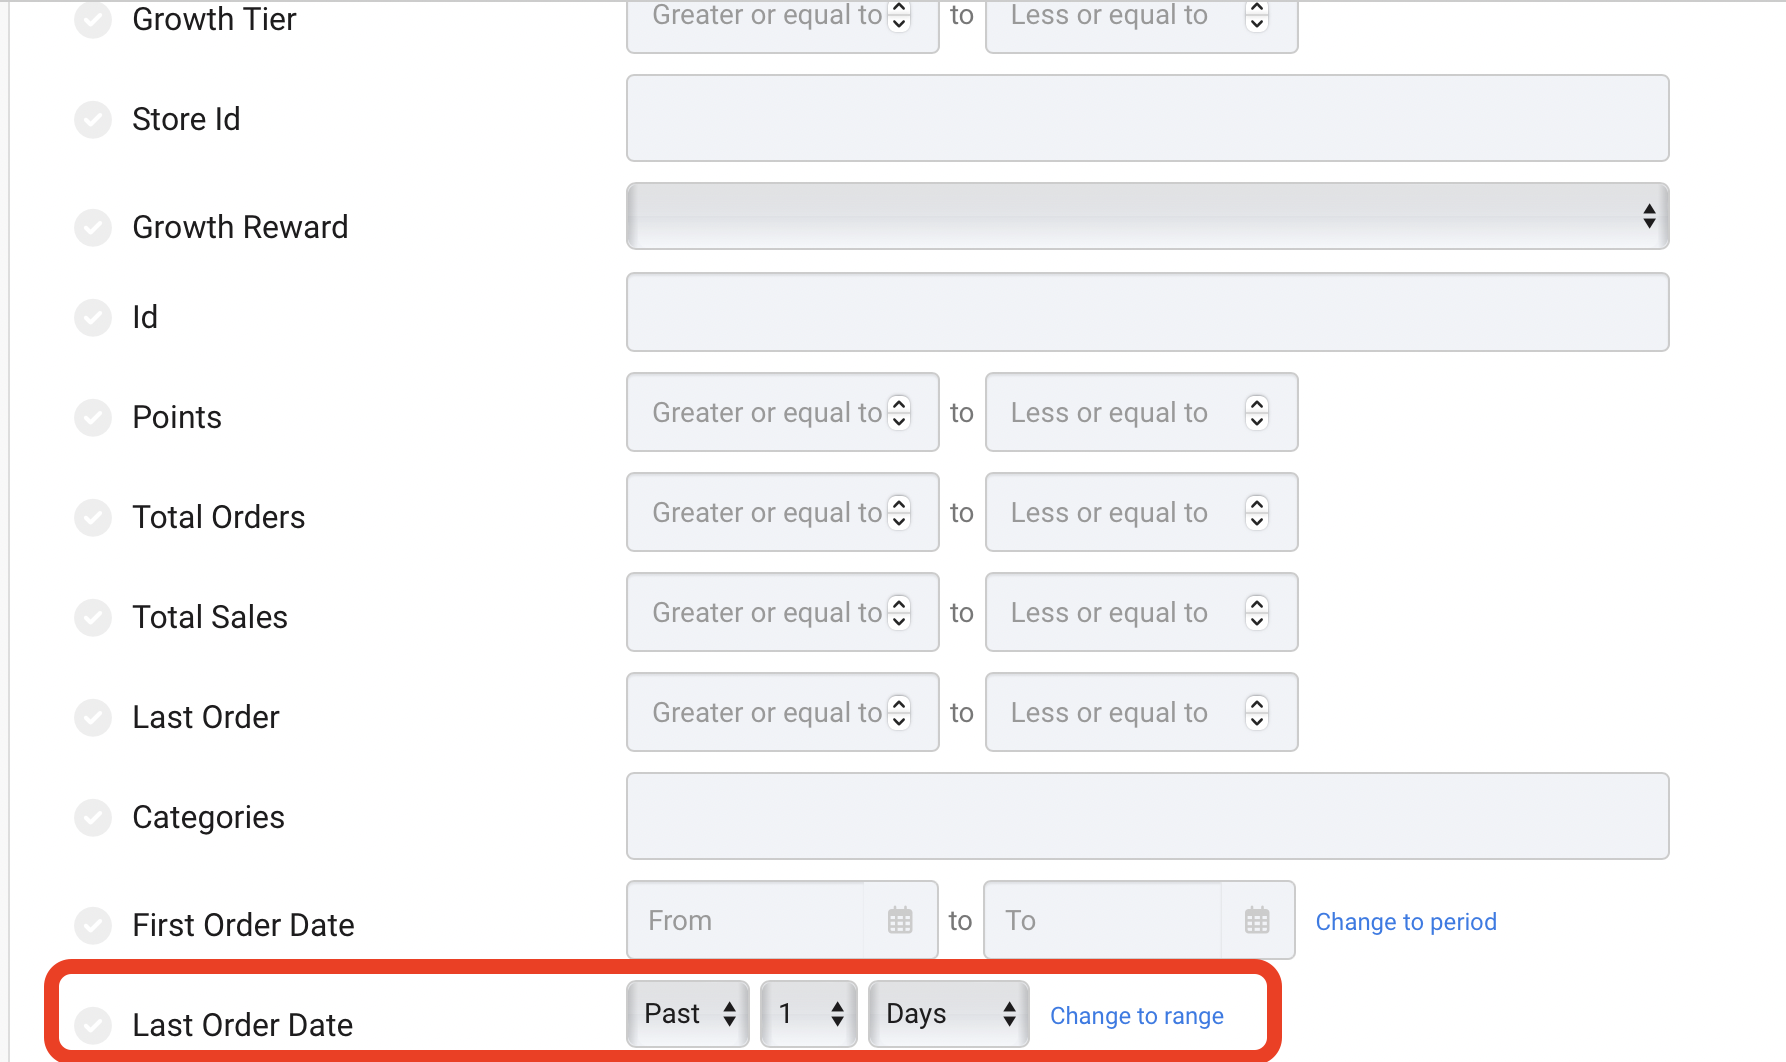
- Look for the filter search field you want to celebrate like
Last Order Dateand change it from Range to Period. You can set this to be for the next 14 days, 10 days, 2 days...whatever date range you would like to begin sending texts &/or emails to your customers. For this example, we're going to choose in the past 1 day. Hit the greenSearchbar to return the results. If the contacts look like what you were expecting, clickCreate Segment.
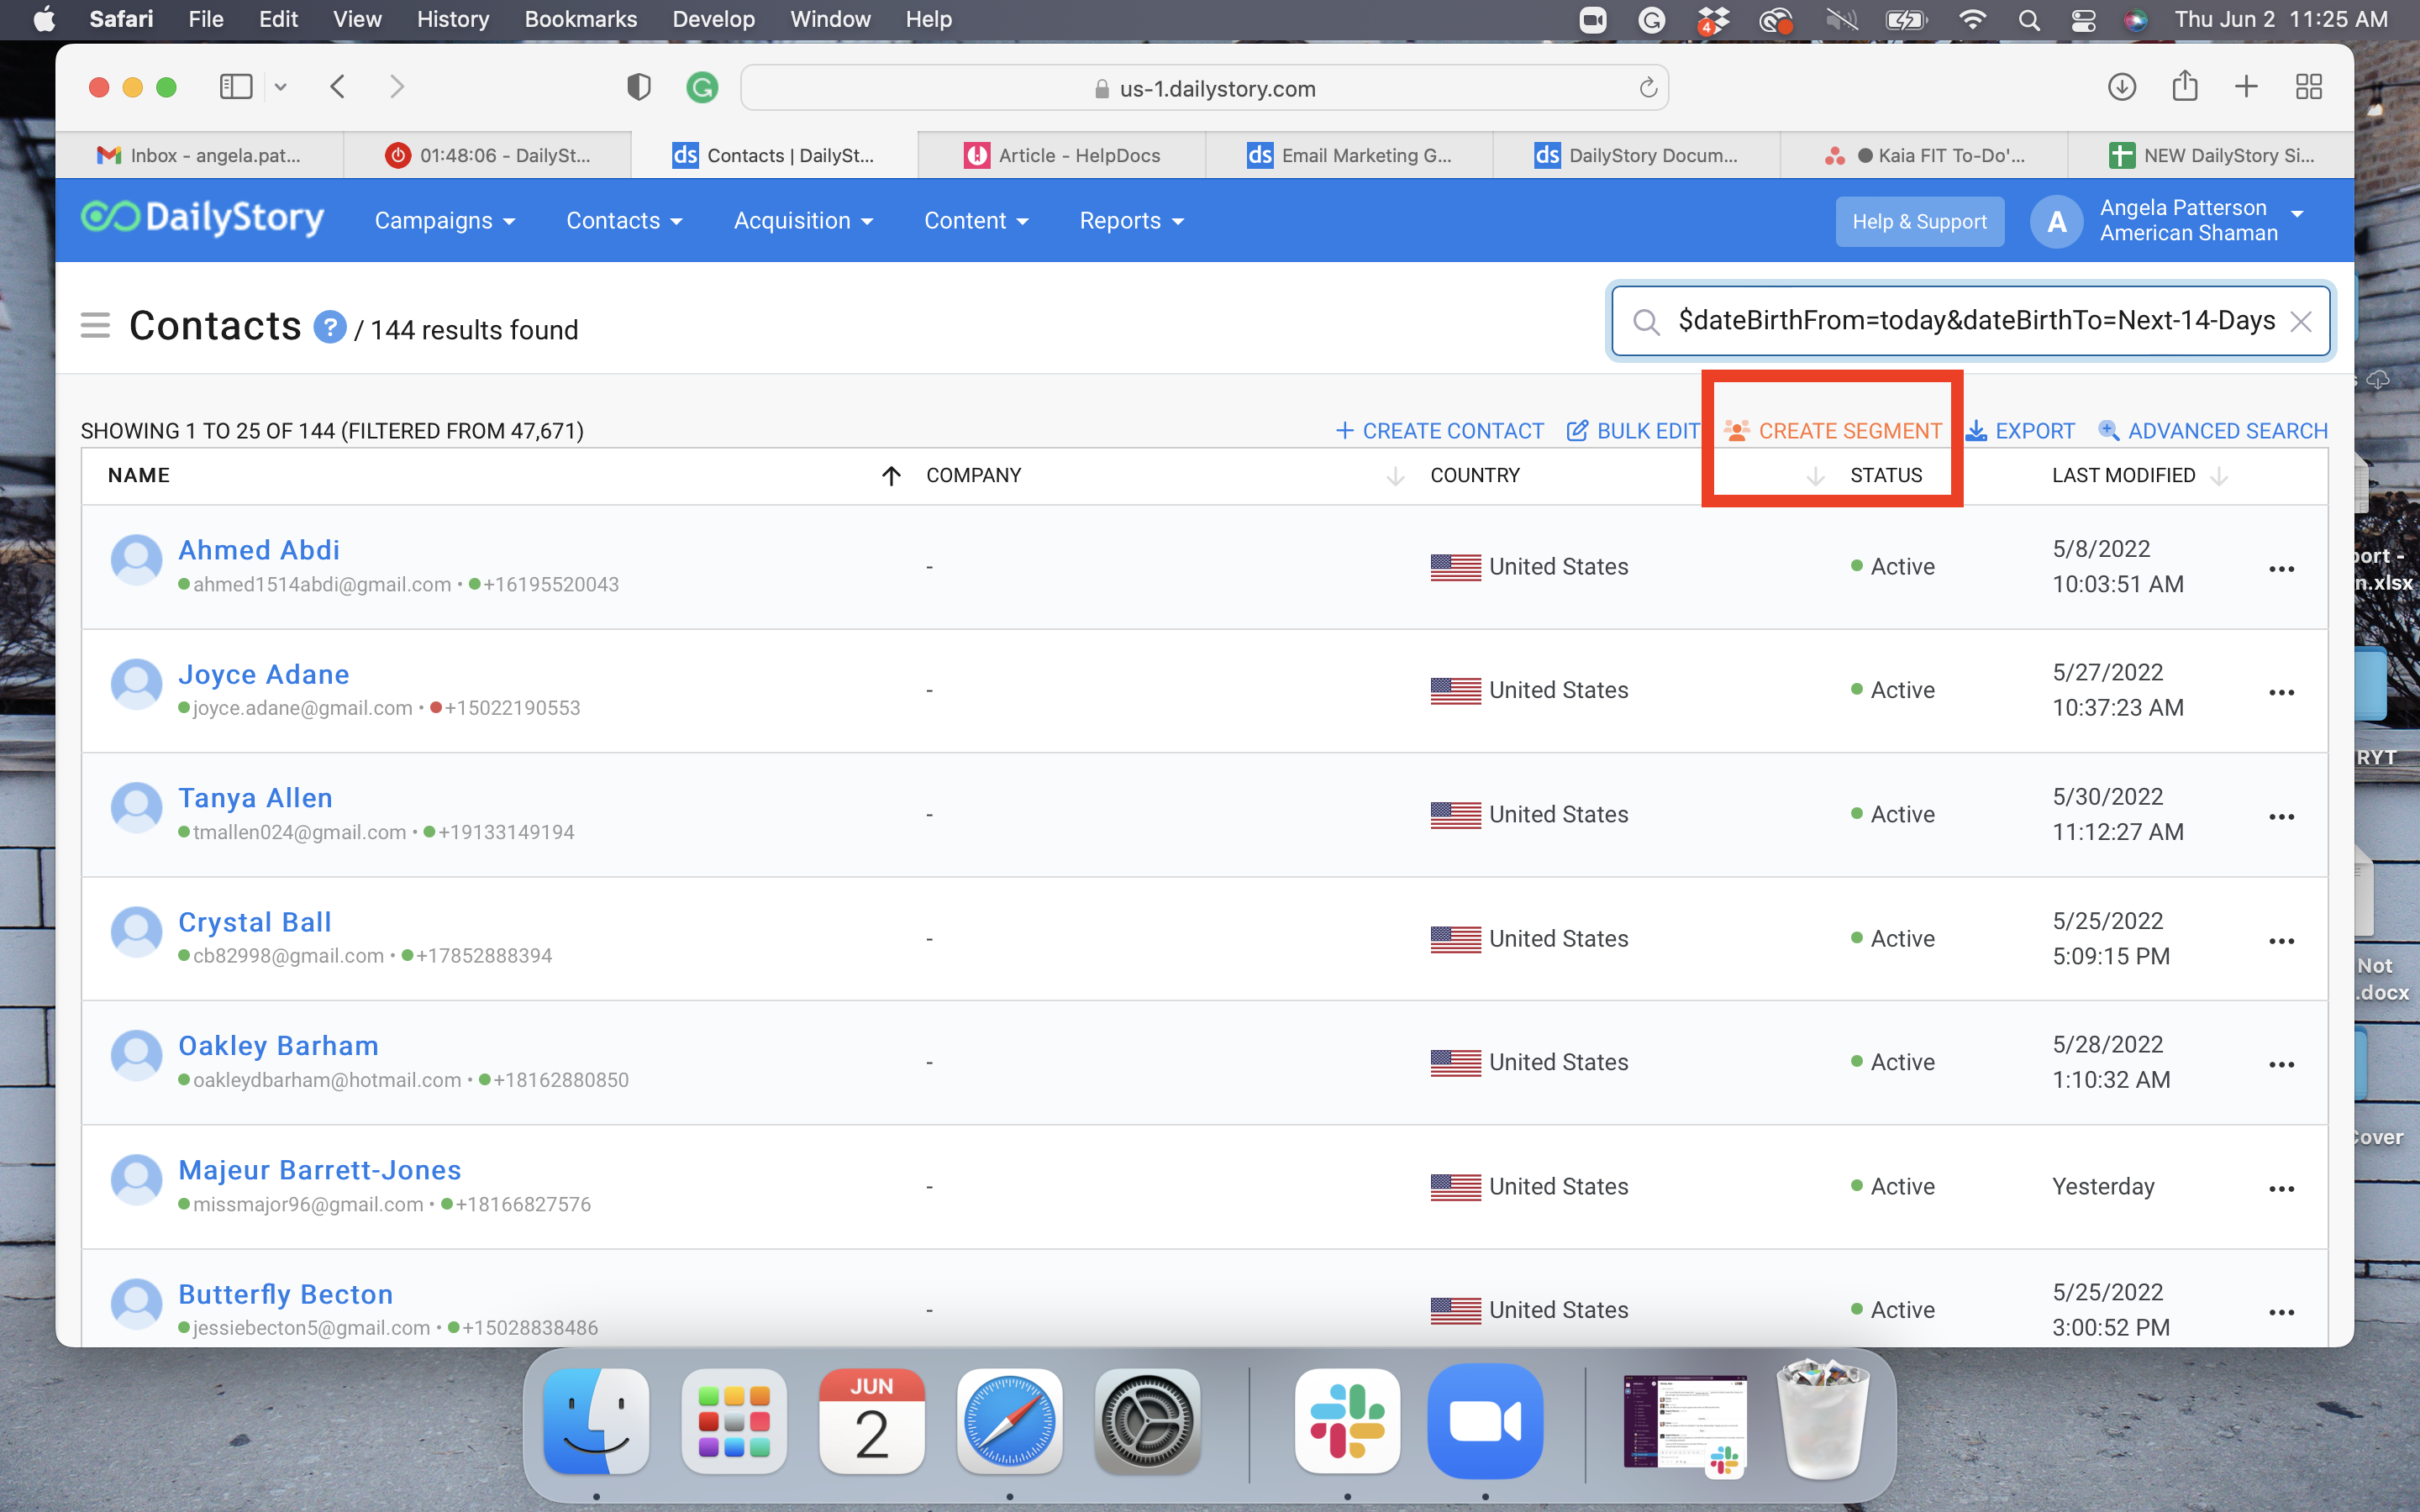
- Follow the steps to name, describe and save your segment.
Click here for more help with creating and working with dynamic segments.
STEP 2: Create a campaign
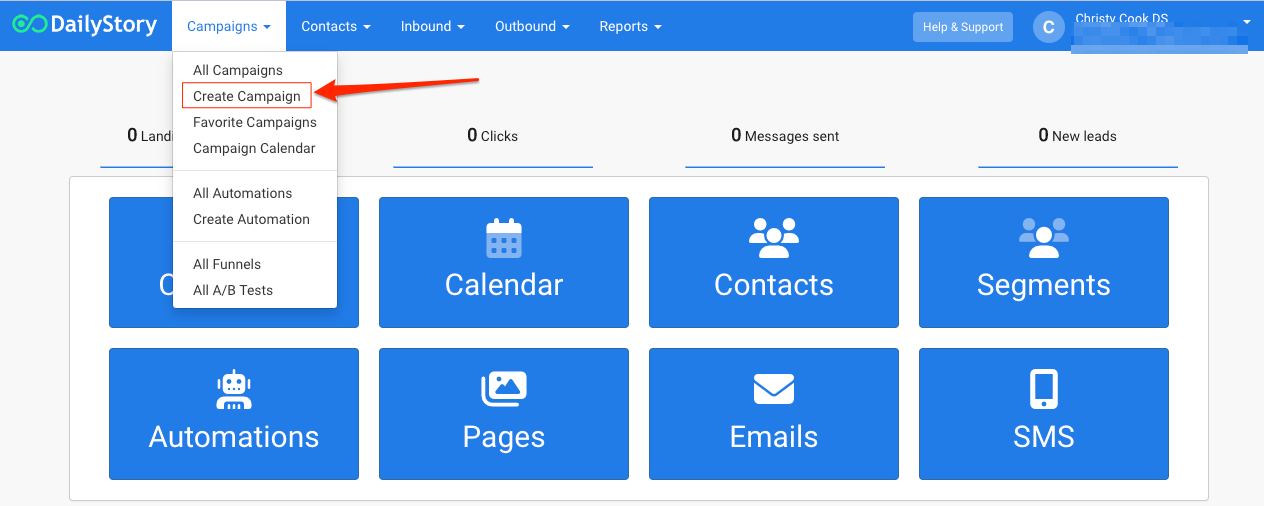
- Navigate to
Campaigns > Create Campaign - Name the campaign Referral Campaign. Click
Create Campaign.
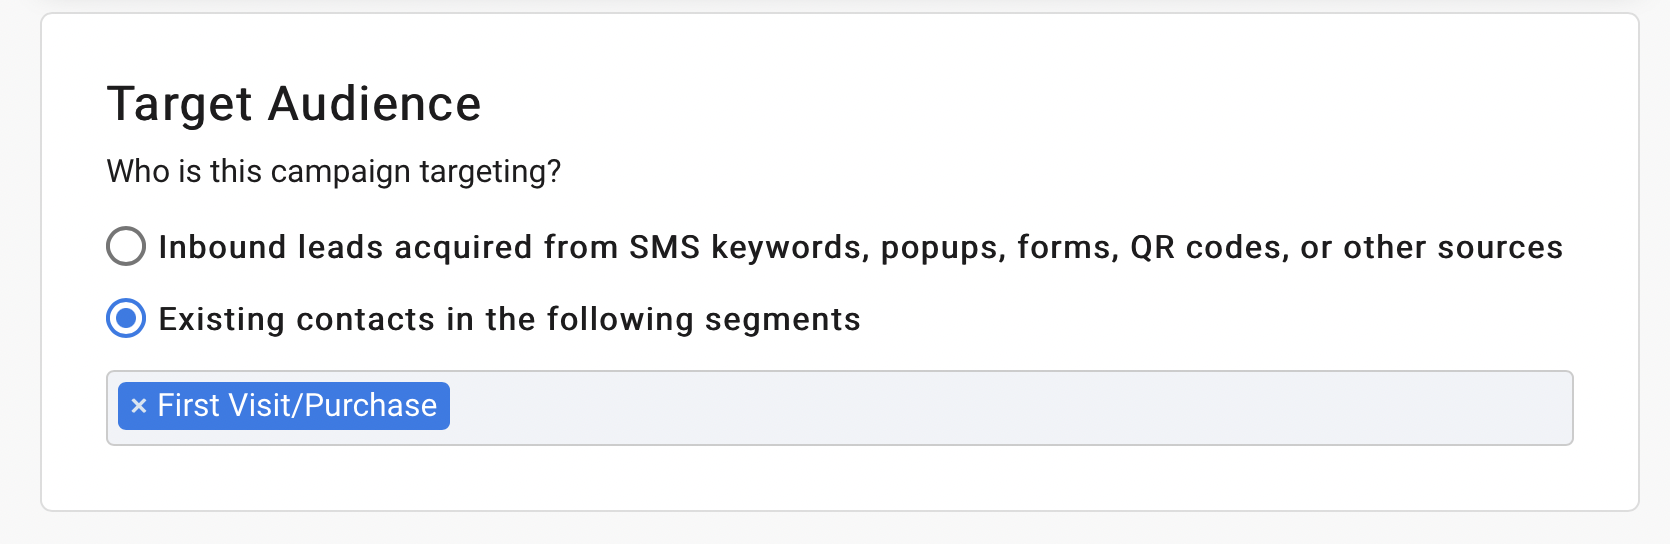
- You will be taken to the campaign's settings screen where you can name it, give an optional description, pick your audience and other settings.
- In the Target Audience section, select the radio button next to
Existing contacts in the following segments.Select the segment you created in Step 1 from the drop-down list. - Click
Save & Close.
Click here for more help with creating and working with Campaigns.
STEP 3: Create a referral email or text message
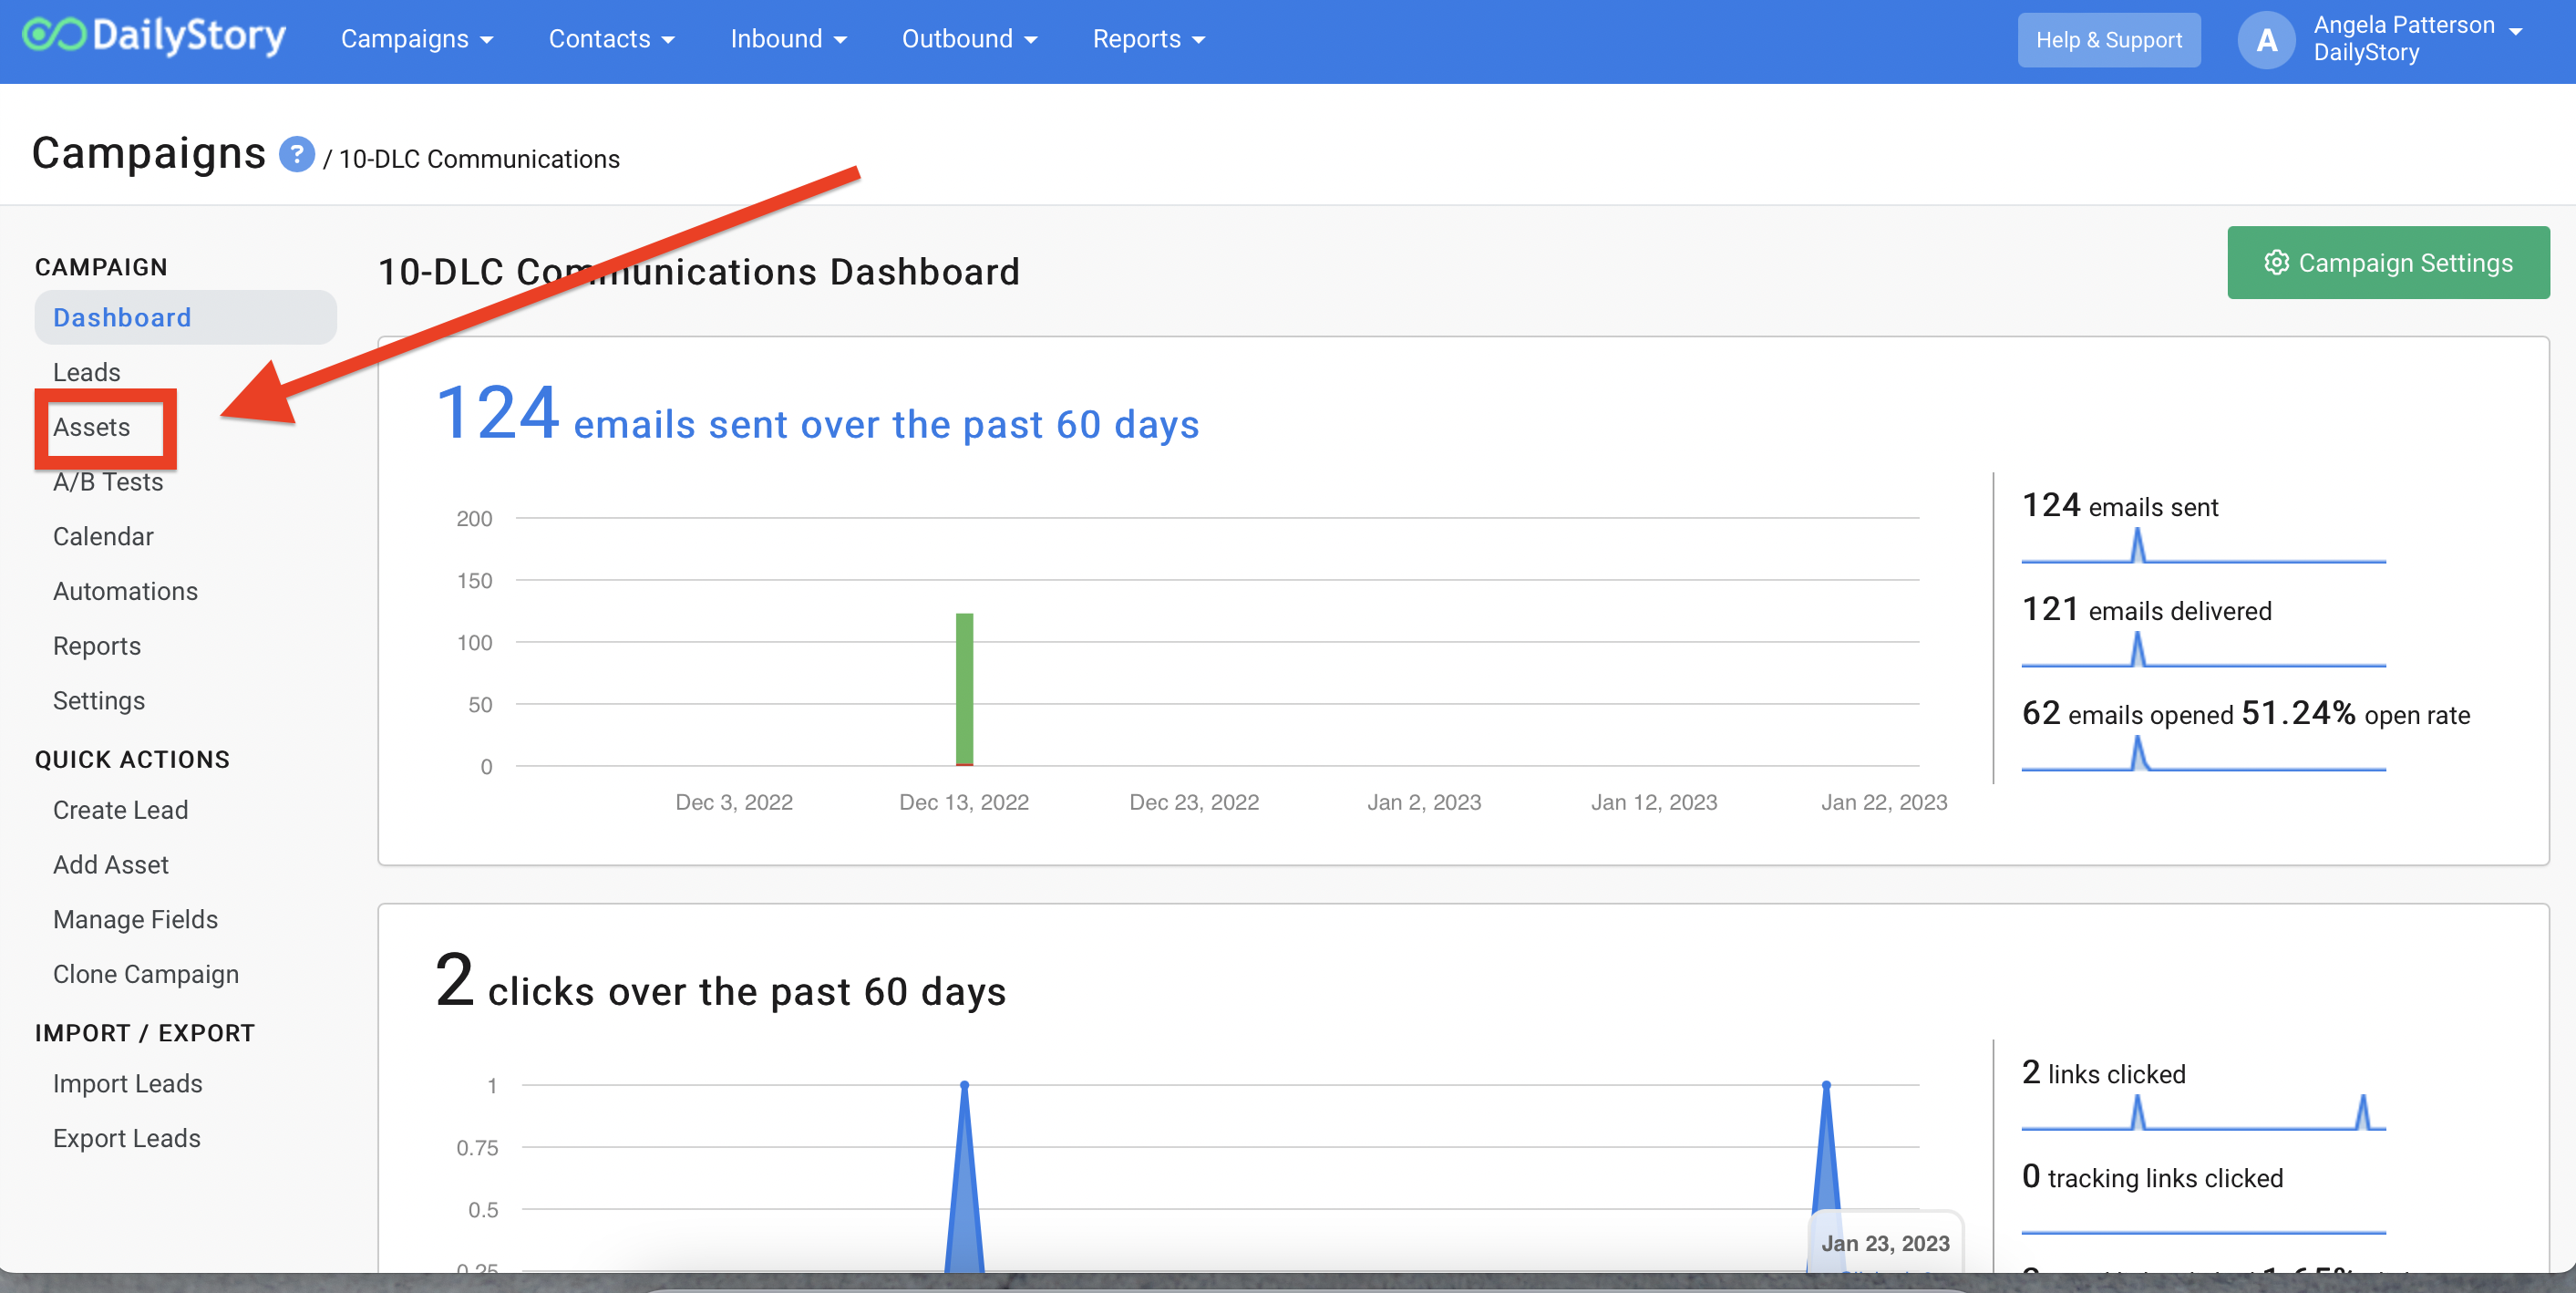
- From within the campaign, select the Assets tab and then click
+ Add Asset.
- Select
Add an EmailorAdd a Text Messagefrom the popup menu. - Fill out the settings and add your content to either selection and click
Save & Close. You will now find that "asset" under the assets tab in your campaign and can go back and edit it whenever you like.
Click here for more help with creating text messages or creating an email with the email designer.
STEP 4: Automate your campaign
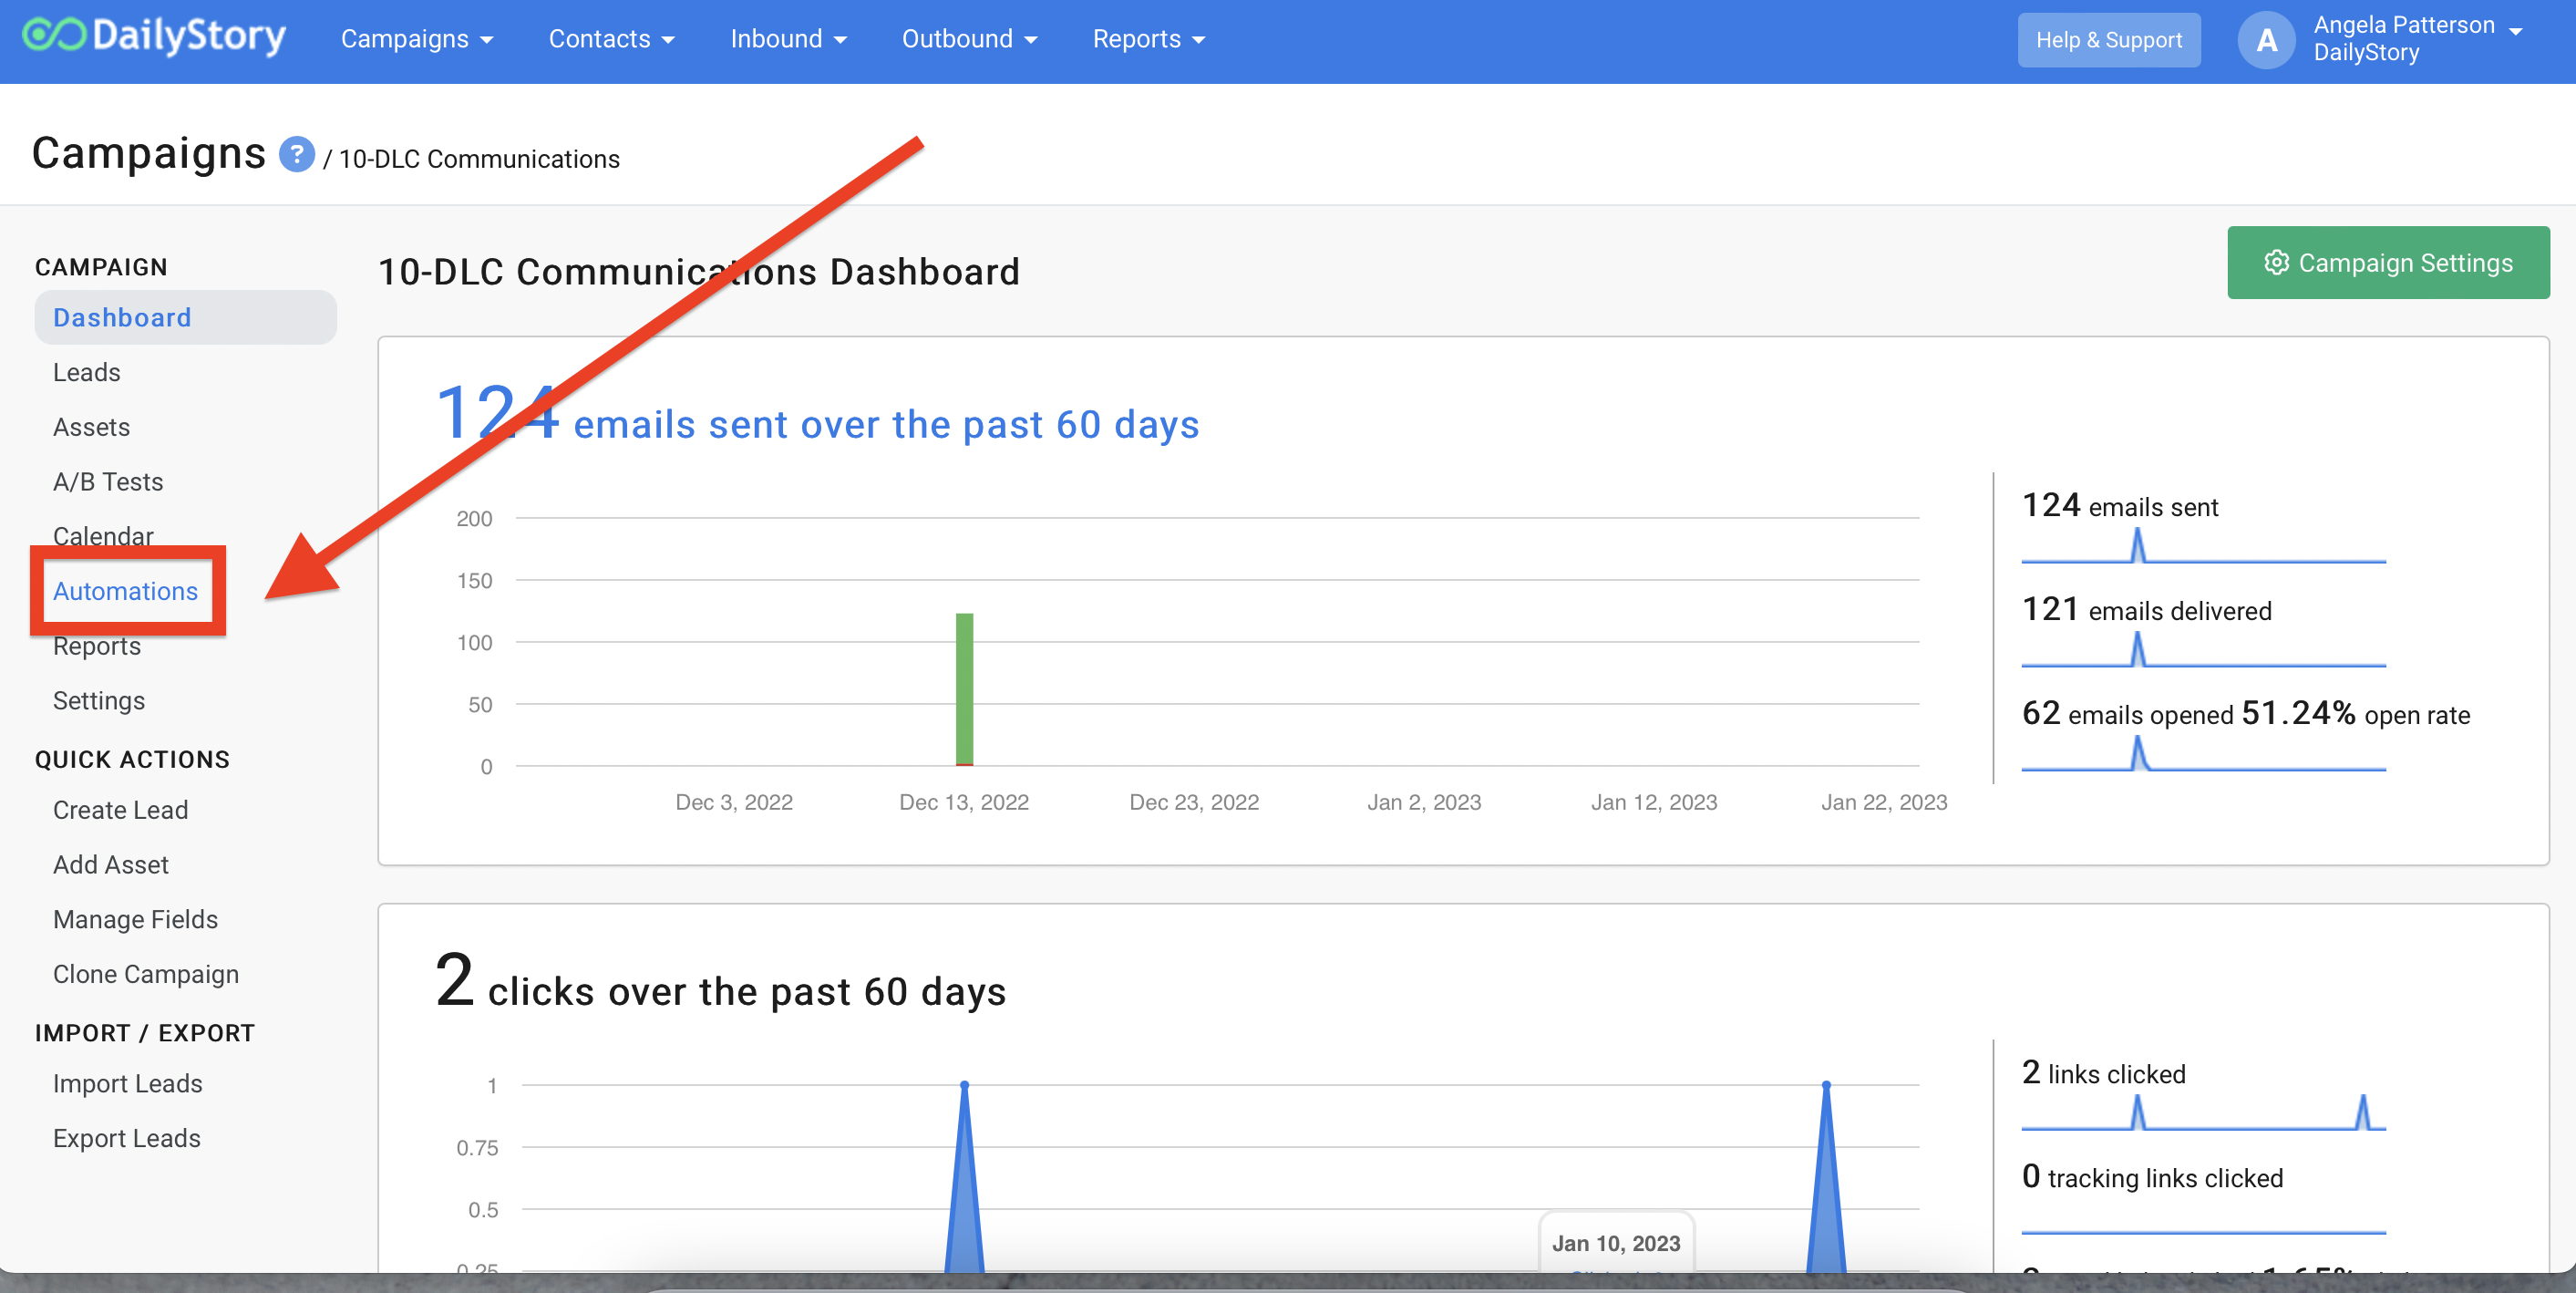
- From within the campaign, select the Automations tab and then click
+ Add an Automation.
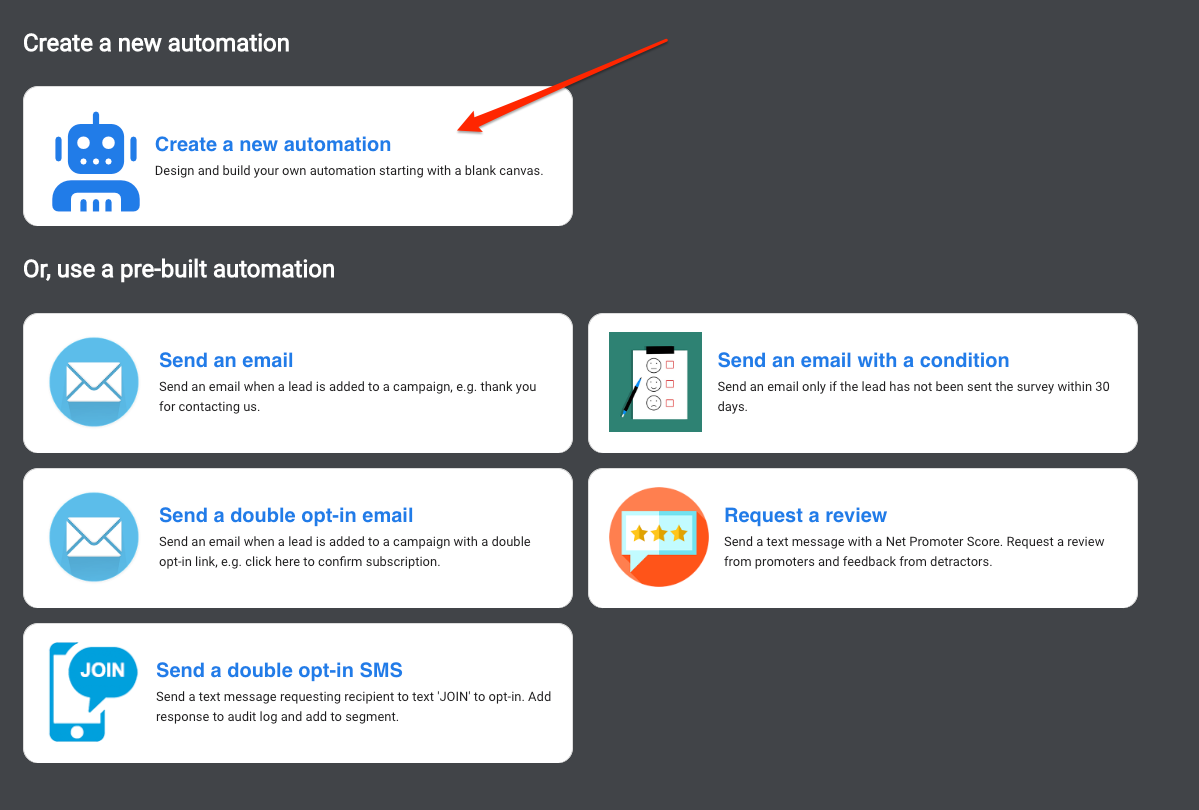
- Select
Create a new automationfrom the automations window.
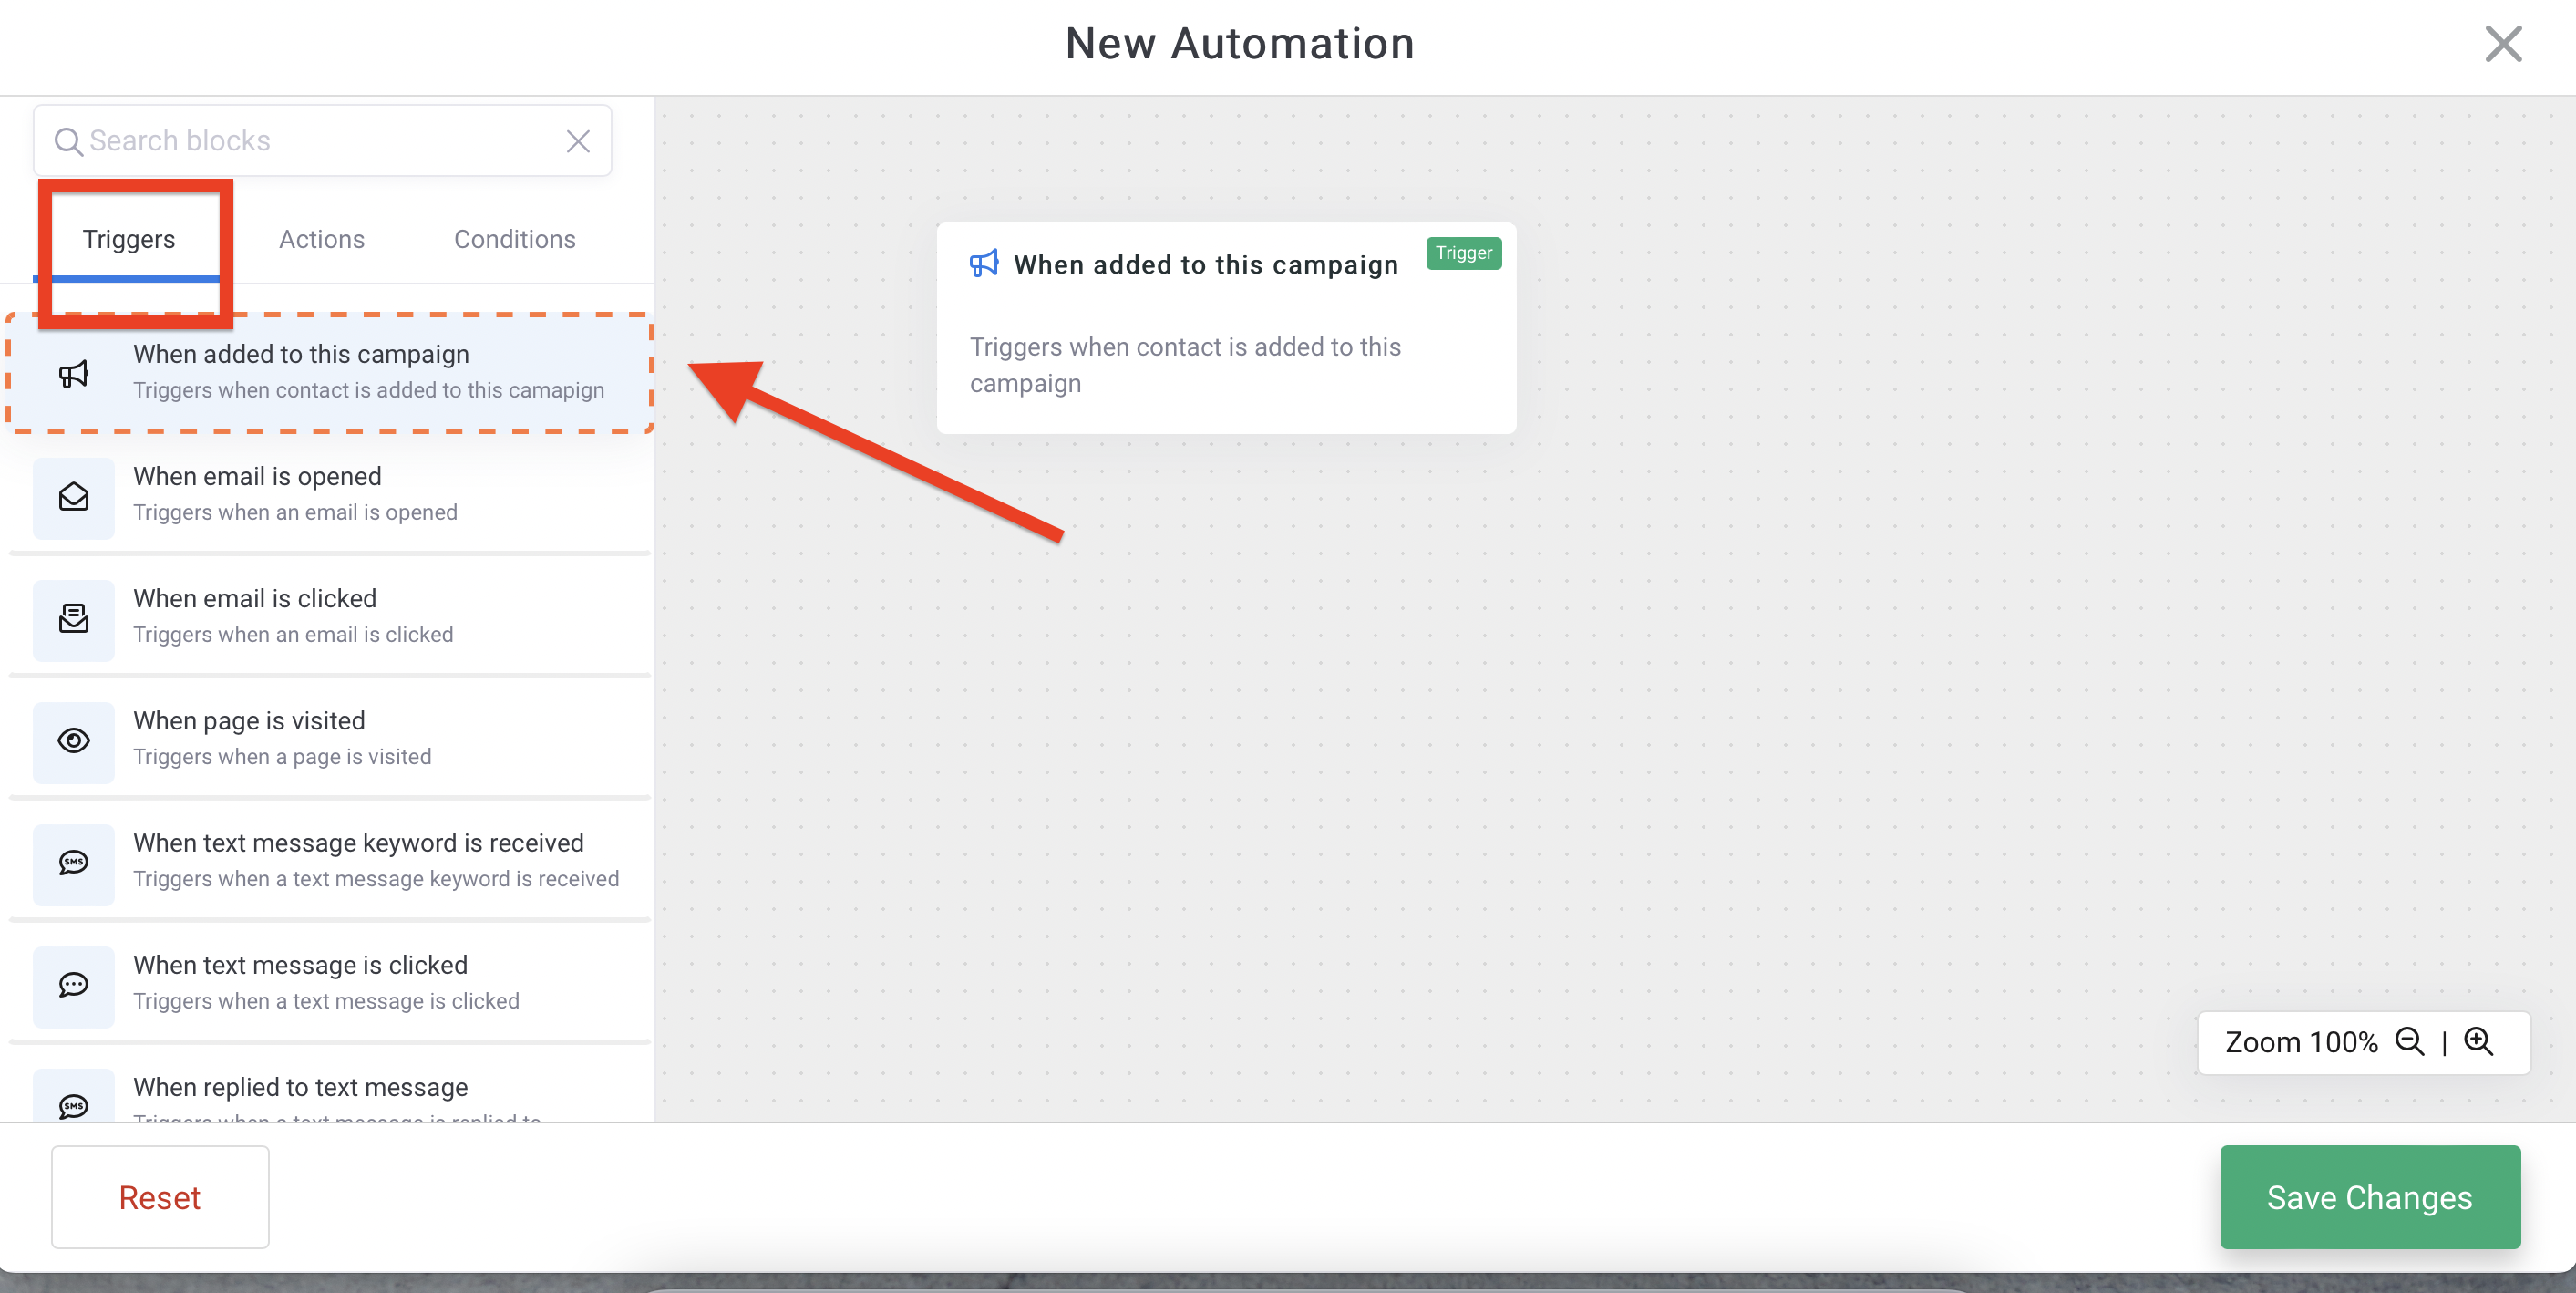
- From the Triggers tab, drag and drop the trigger
When added to this campaignonto the canvas.
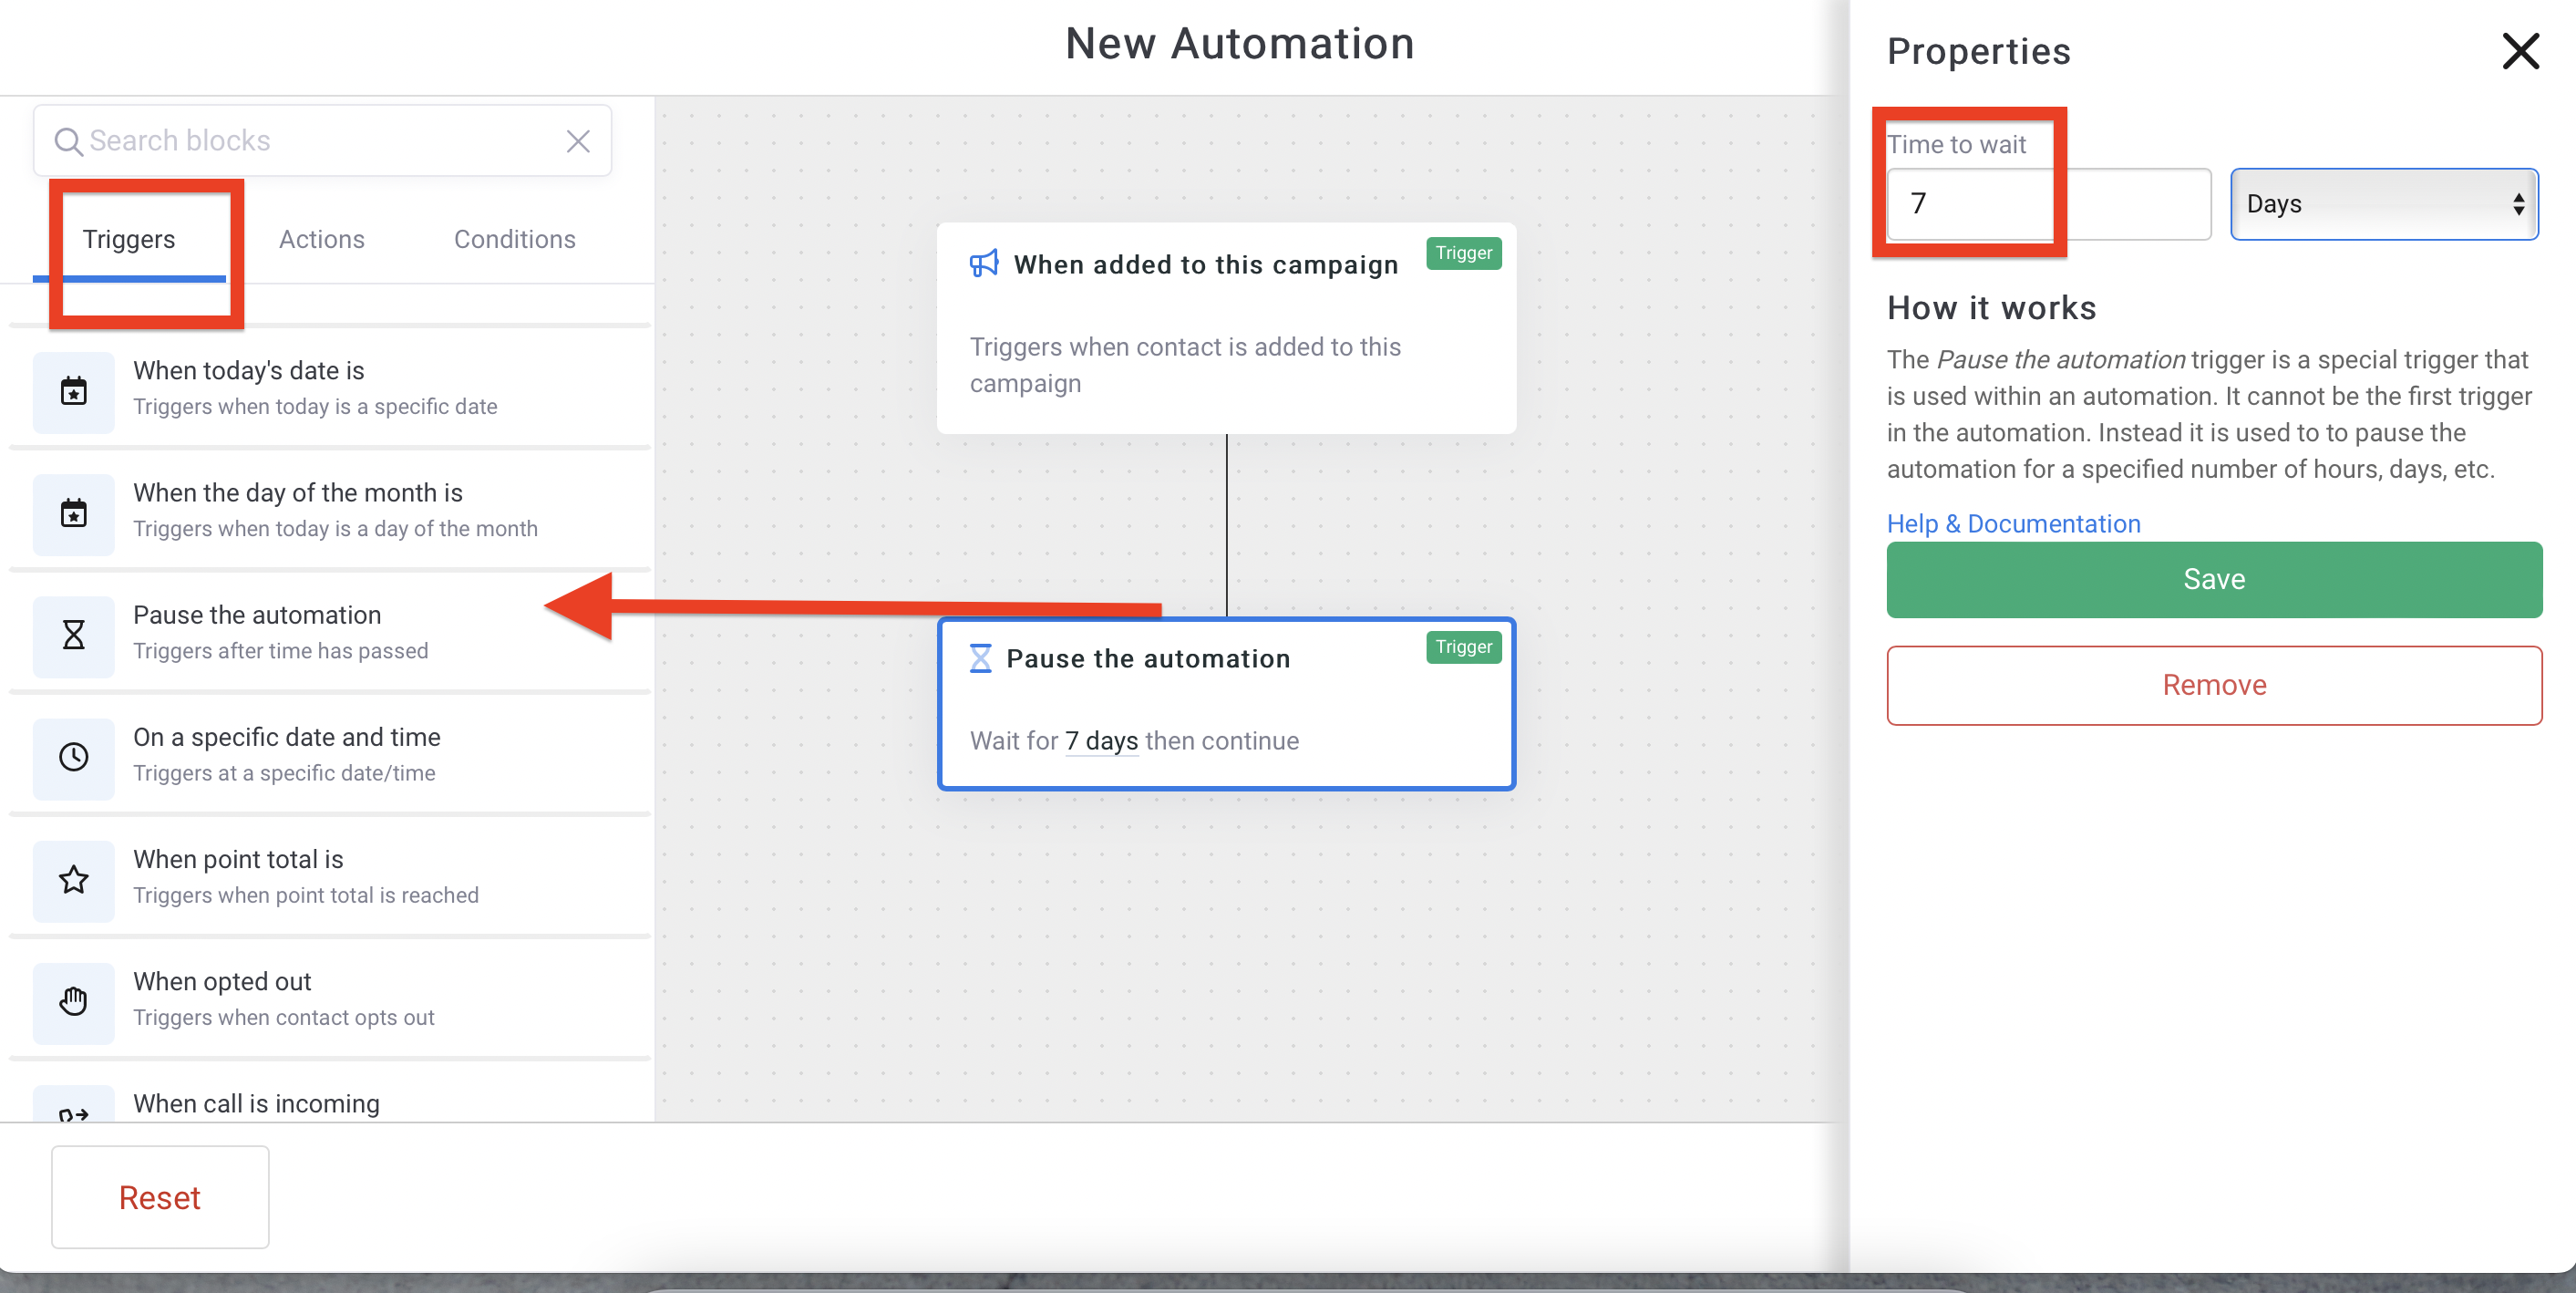
- From the Triggers tab, drag and drop the
Pause the Automation. You can choose whatever time frame fits your need and preferences. For this example, we'll choose 7 days. This means we want to wait 7 days after they've made their last purchase before we go to the next step of sending them our message. Remember: they get added to the campaign from the segment we attached and they get added to the segment we designed based on their last purchase date of 1 day ago.
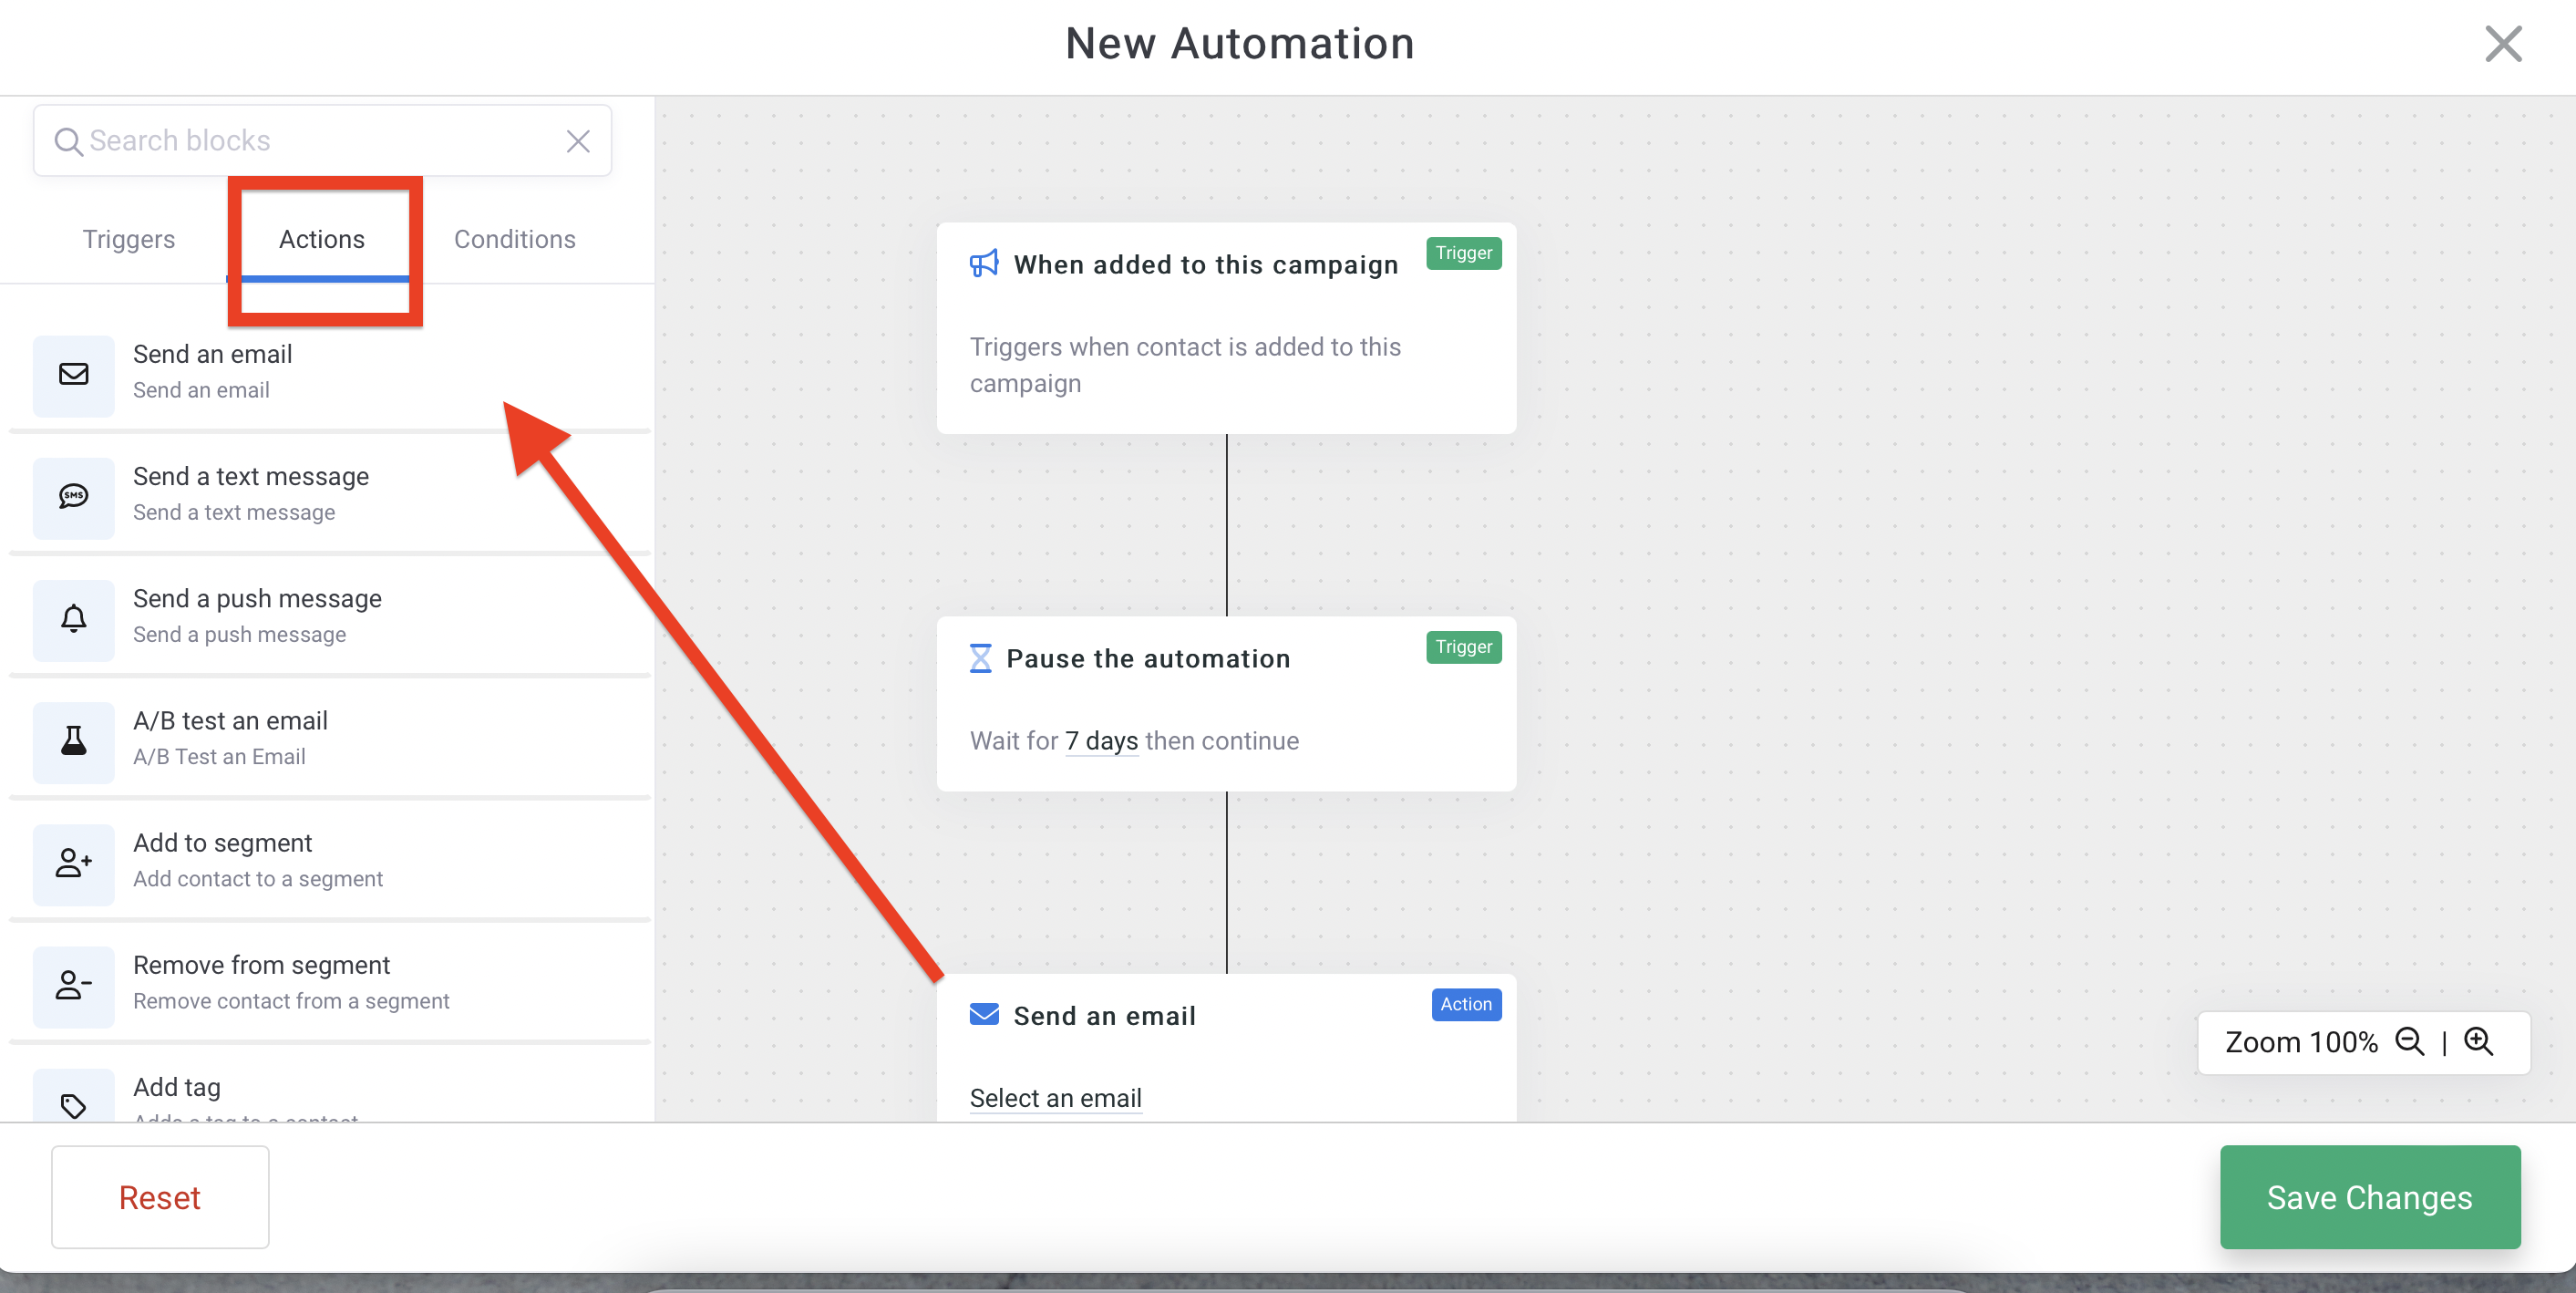
- From the Actions tab, drag and drop the action
Send a text messageorSend an emailonto the canvas overlapping the previous step so it will drop into place. Select the text message or email to send and any restrictions on the day and time from the menu to the right.
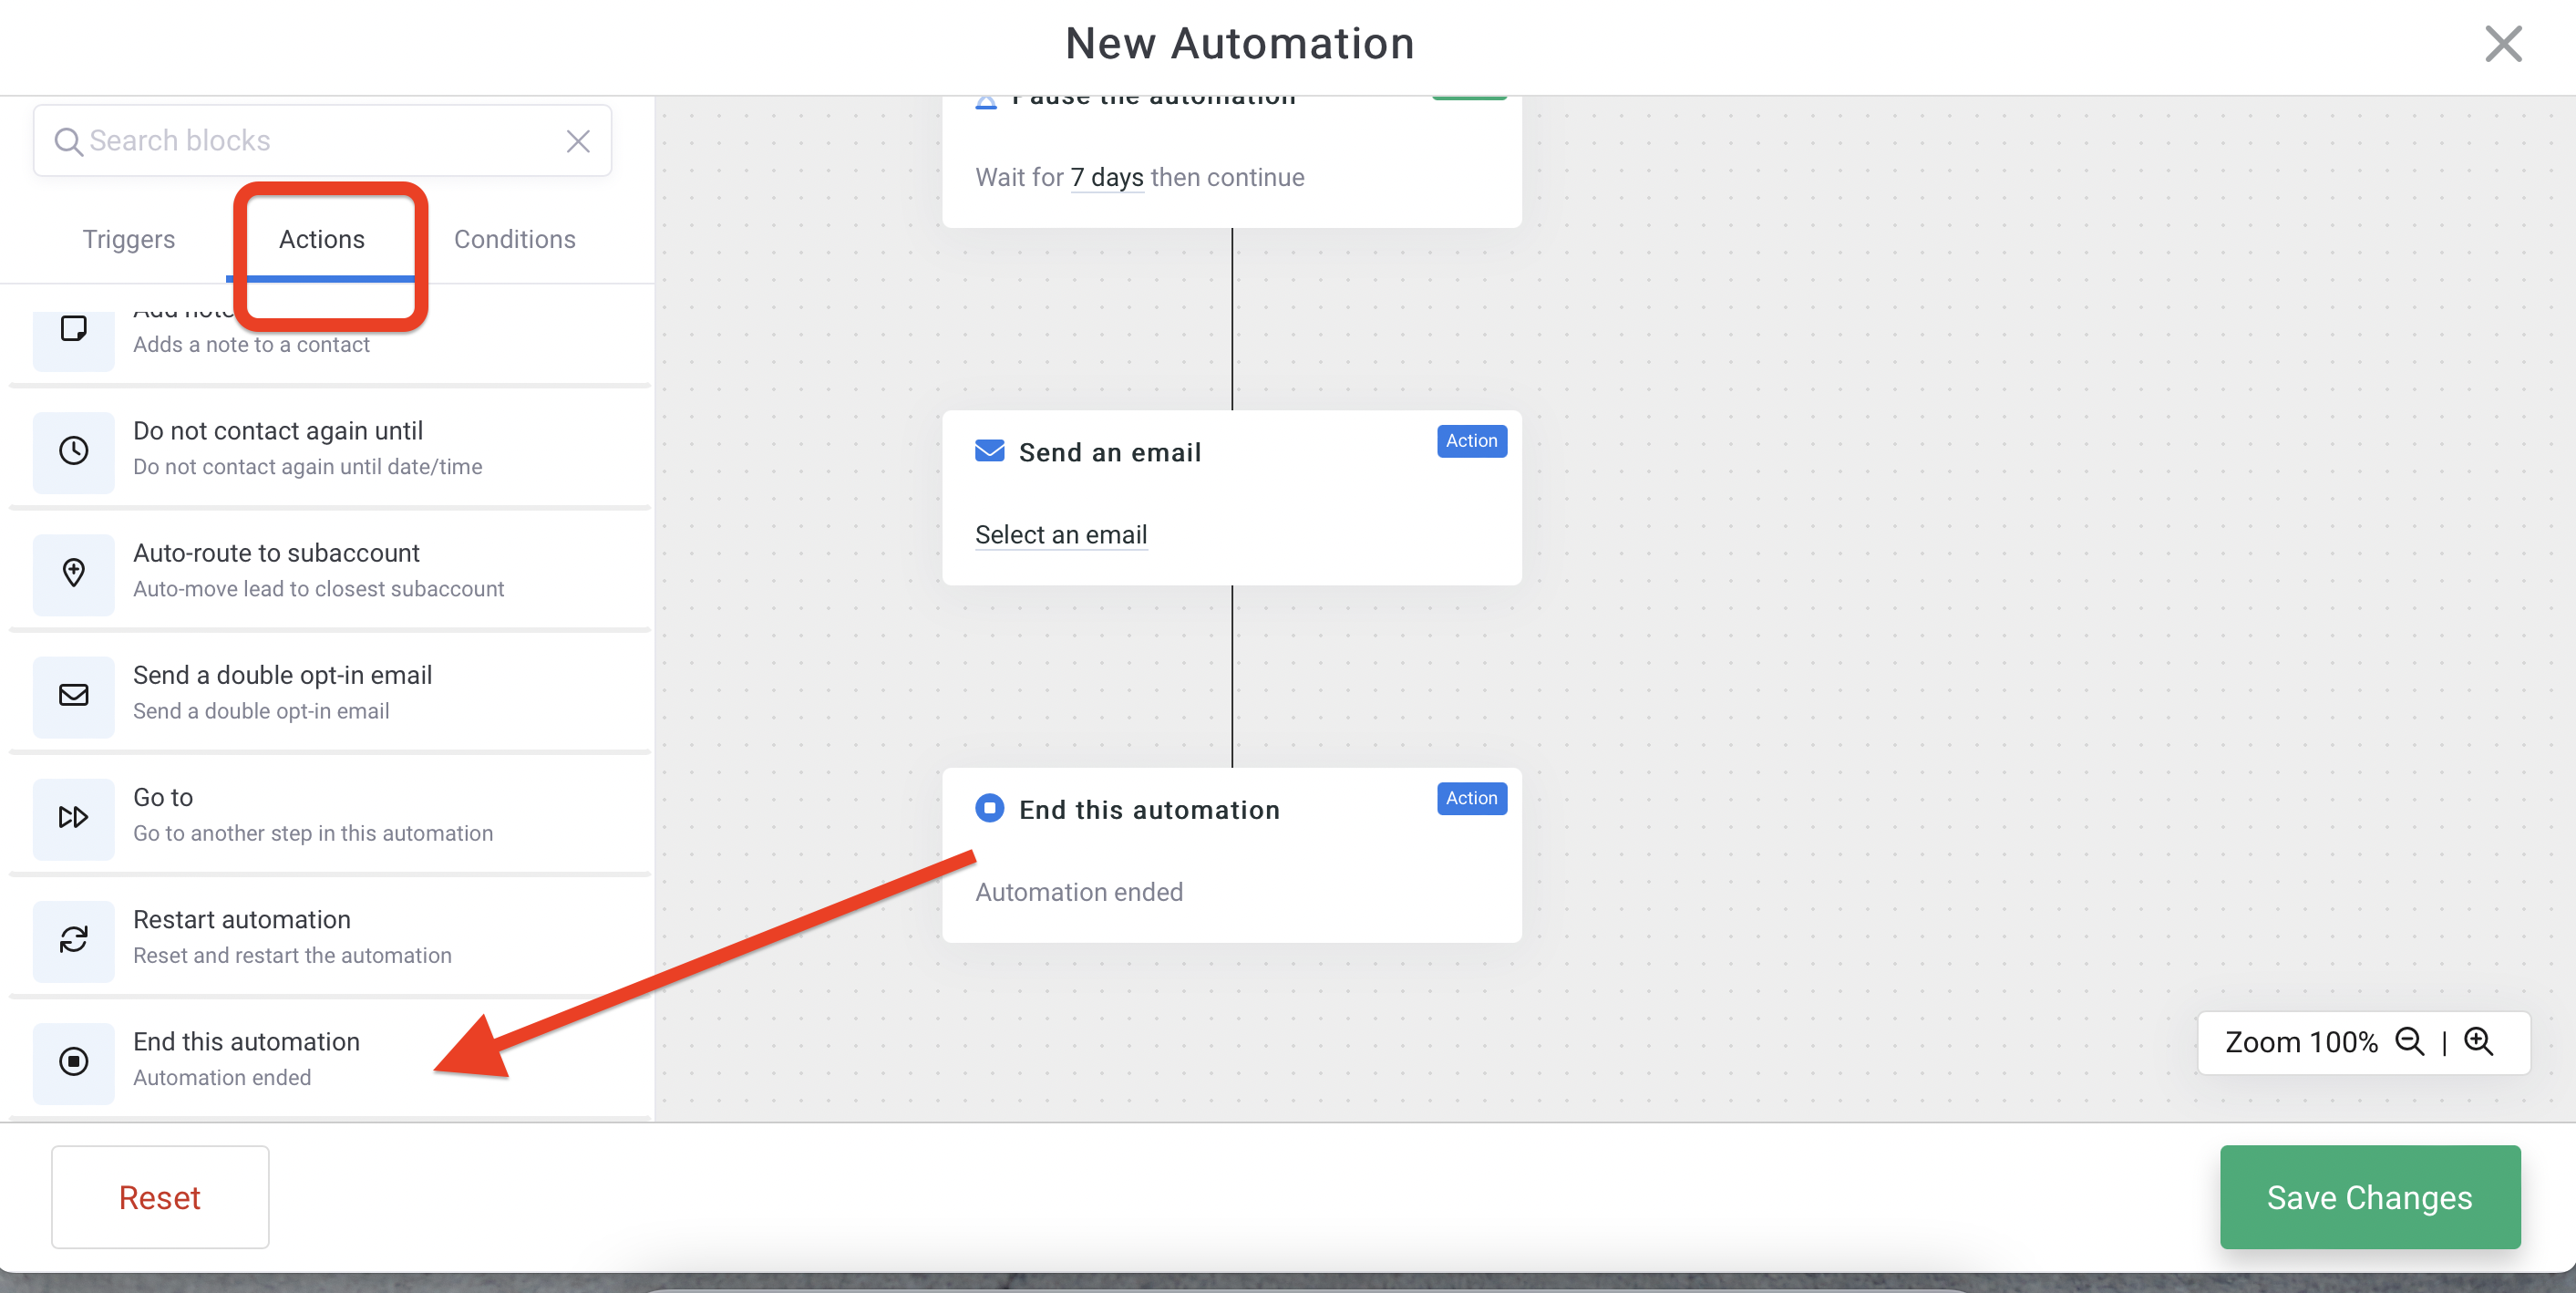
- From the Actions tab, drag and drop
End the automationonto the canvas overlapping the previous step. Select the campaign from the menu on the right.
 Recommended
We're ending the automation so your customers aren't consistently targeted to refer someone. Customers will get added to this segment after their last order, and fall into the automation.
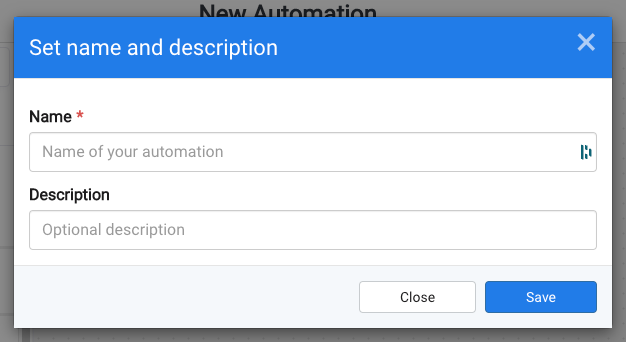
- Click
Save Changesfrom the bottom right of the screen. Give your automation a Name and optional Description in the popup window and clickSave.
- Now, make sure the enabled button is switched to
Runningif you are ready for messages to begin automatically sending and click onSave & Close.

Click here for more help with creating automations.
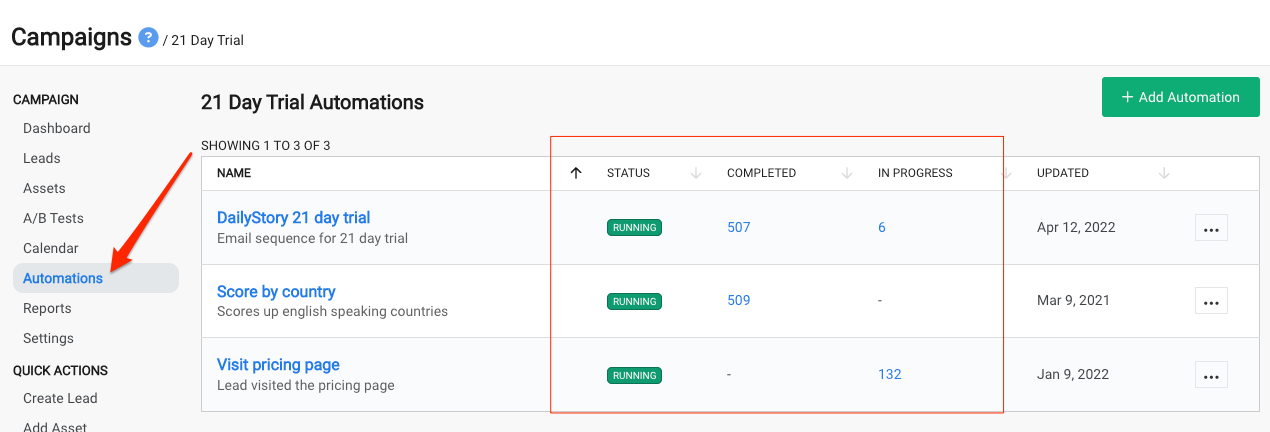
You're all set! You can track the results in your reports as well as see at a glance who has run through your automation(s) and who is in progress.