Automation Guide
DailyStory includes a friendly, drag-and-drop automation builder. You can model out complex user journeys and experiences using Triggers, Actions and Conditions.
Common automation examples
- Welcome a new customer
- Thank you for contacting us
- Happy Birthday
- Happy Anniversary
- We haven't seen you in a while
- Loyalty point offers
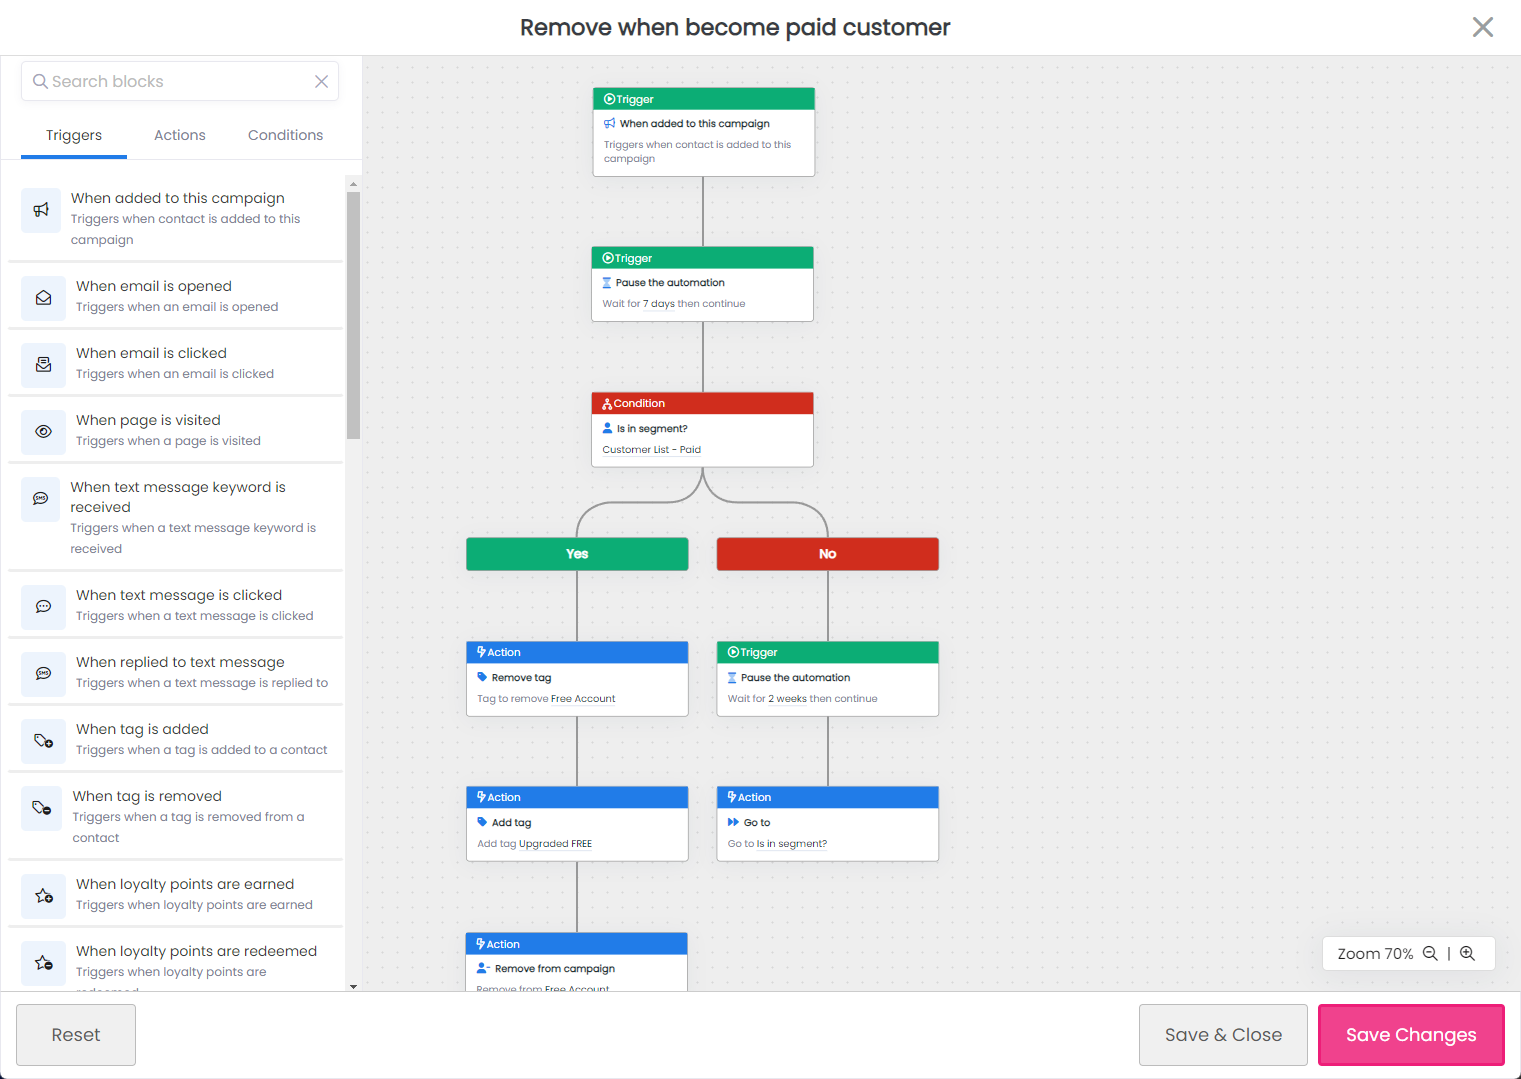
Parts of an Automation
- Triggers - Triggers "start" an automation. For example, when a new lead is added to a campaign.
There are several "special" triggers aren't used to start an automation but instead are used to delay processing of an automation until a specific condition is met. Examples include: Pause the automation to delay by minutes, hours, or days.
- Actions - an action to be performed within the automation. They "do" something. For example, send an email.
- Conditions - steps that support Yes/No logic. They "evaluate" something. For example, was an email opened?
You can find all active automations from the top navigation menu at Campaigns > Automations and campaign-specific automations on the Automations tab within the campaign.
Navigating Automations
The Automations page will display all of your automations across all campaigns.
You will also see a dropdown to filter by 'Show Running', 'Show Inactive', or 'Show All'.
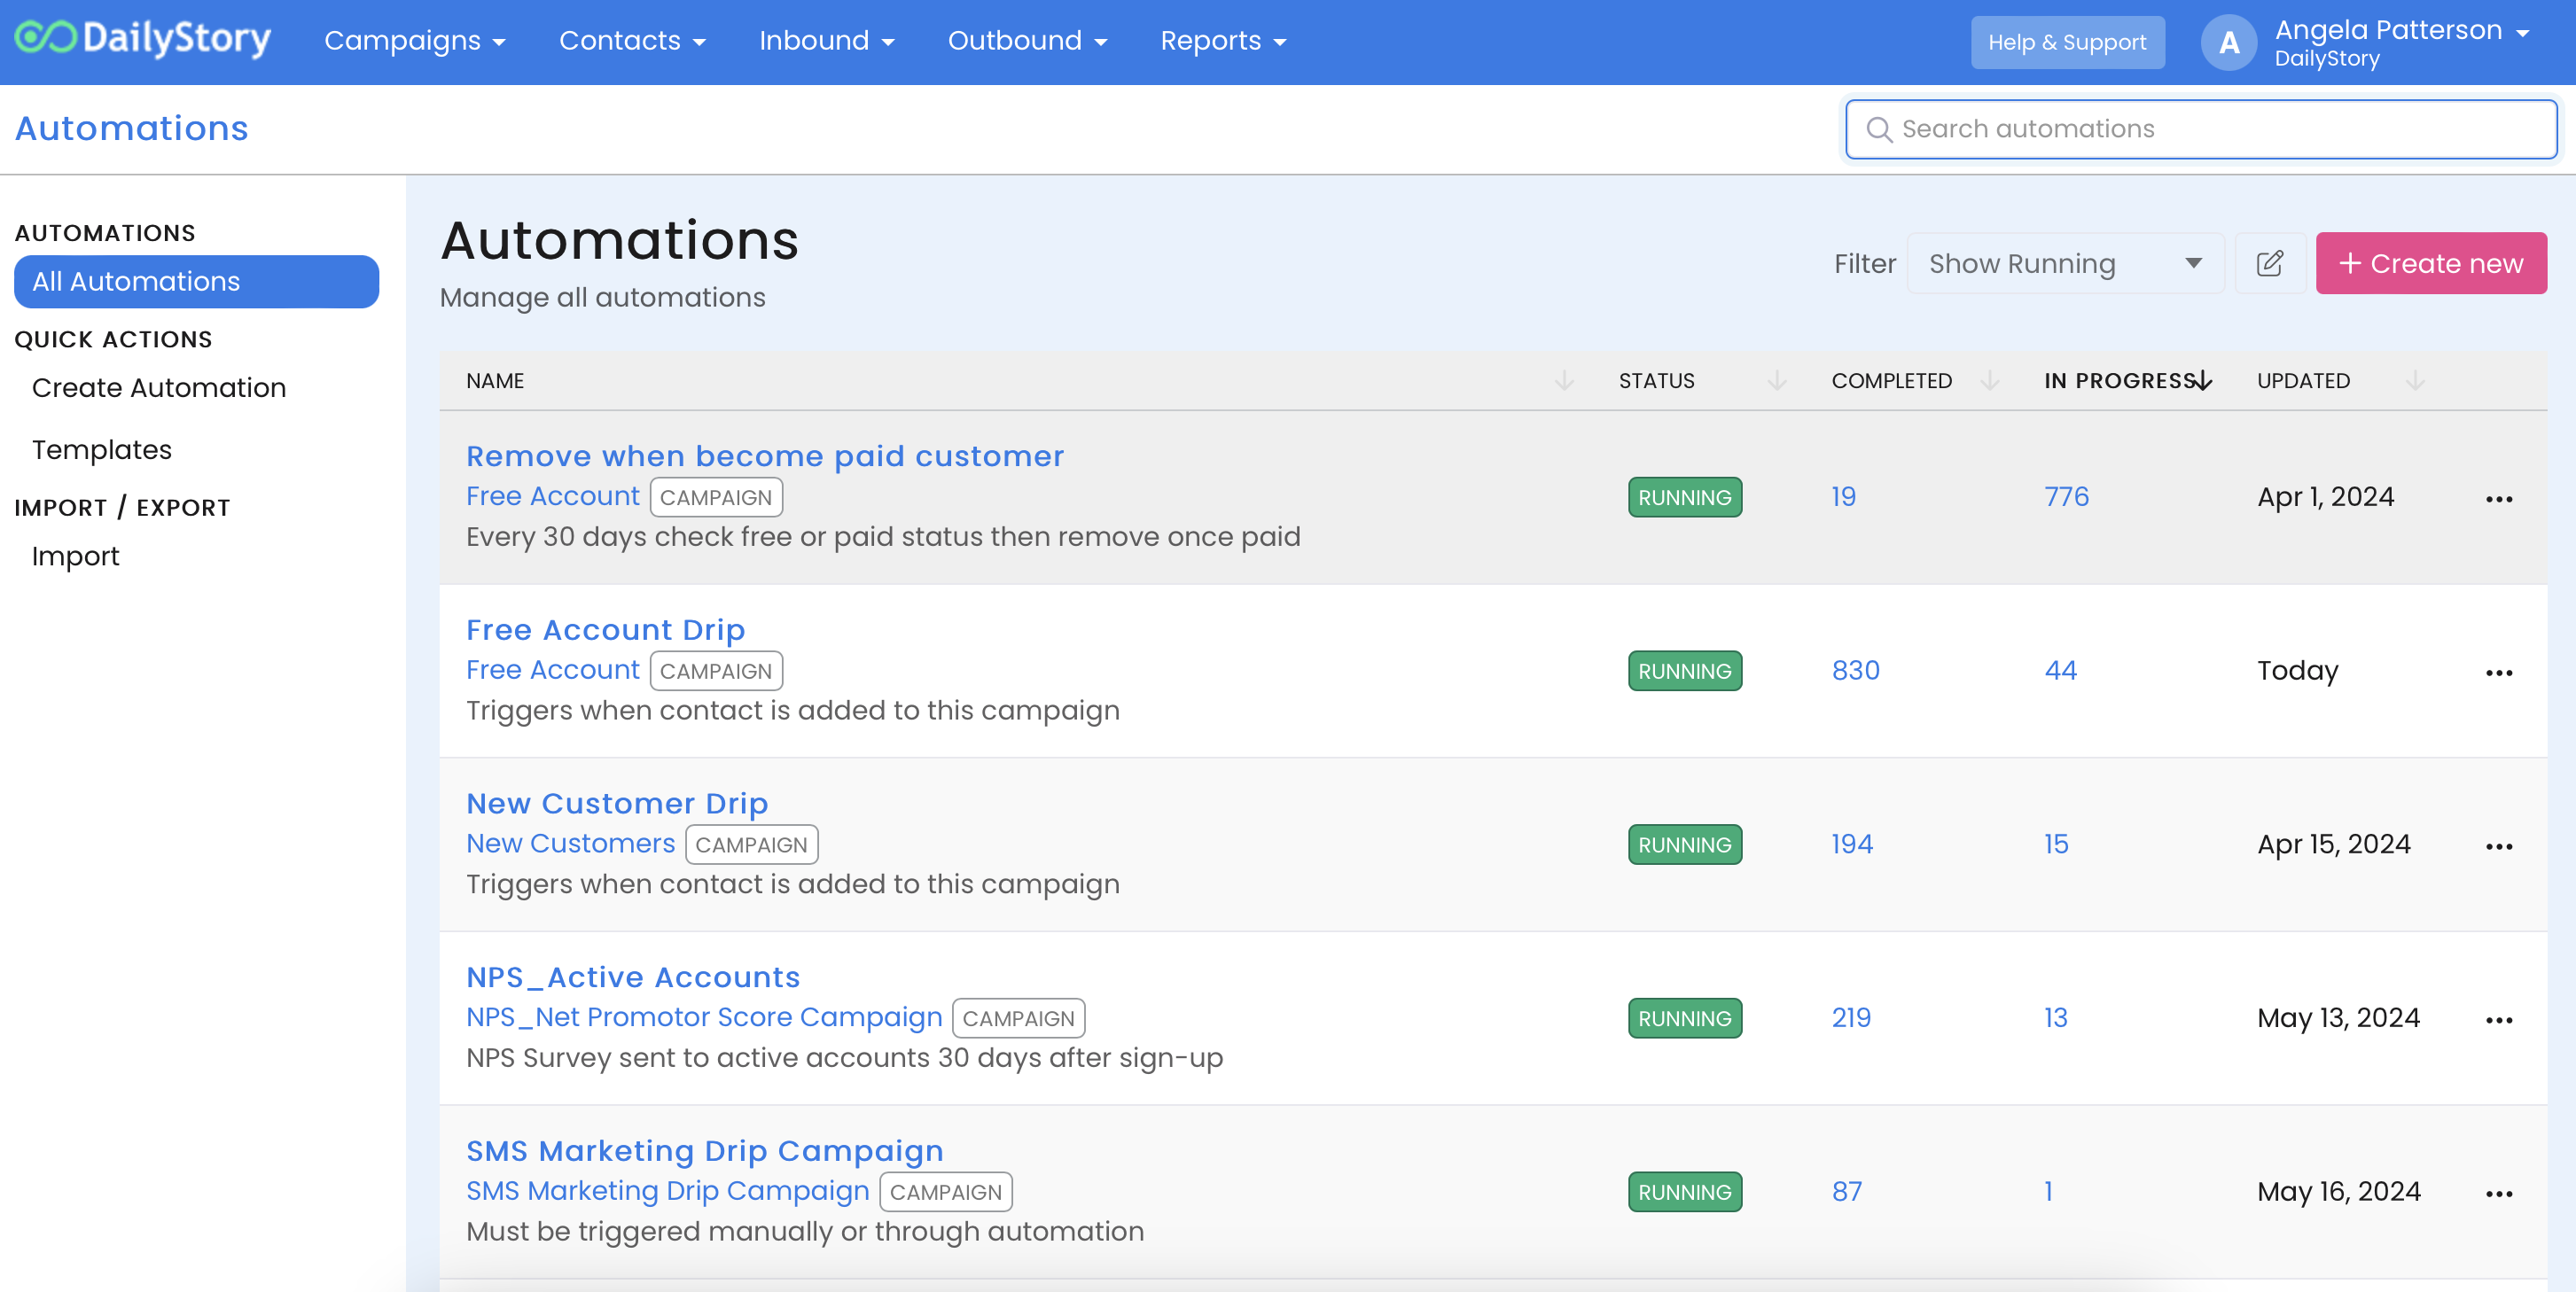
For an individual automation item, you can see what campaign it's assigned to, tell if it's running (or not), quickly access contacts who have completed the automation or are in progress, as well as access the Advanced Options Menu (3 dots) for additional options.
Create or Edit an automation
When creating or editing an automation you'll be presented with the automation settings screen:
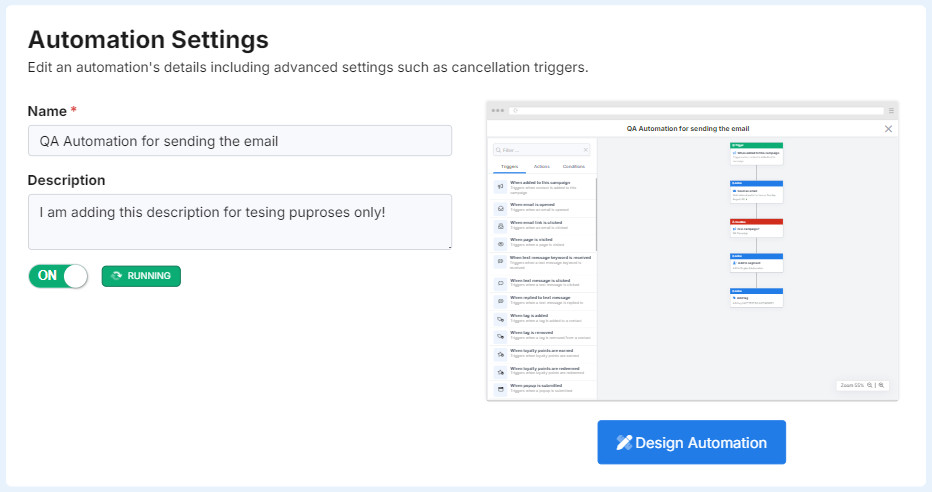
From the screen, you can easily change the name and description of the automation. And, toggle if the automation is running or not.
There are additional configuration options for your automation on this screen:
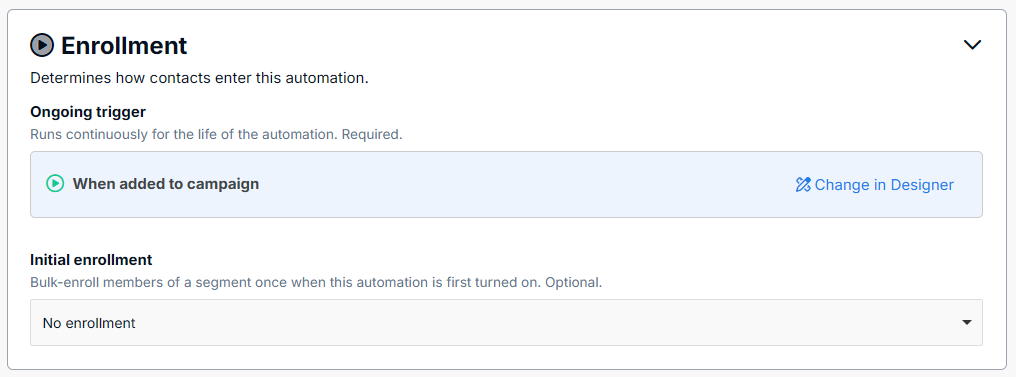
Enrollment
Enrollment determines how contacts enter your automation.
Ongoing enrollment triggers
An automation trigger is required. This is the main mechanism that is used to enroll contacts into your automations. For example, start an automation when a contact is added to a campaign.
In addition to the trigger you may optionally include an initial enrollment segment. The initial enrollment segment is only used the first time an automation is started and will automatically add all contacts in the segment to the automation.
ImportantThe Initial Enrollment option is only shown if the automation has never run. If the automation has ever been run, the initial enrollment option is not available.
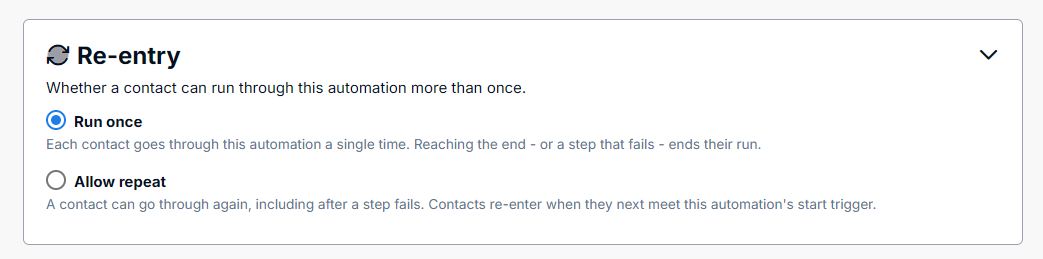
Automation re-entry
Most automations are designed to be run once, such as a new member welcome flow. However, some automations are evergreen and can be run through multiple times. Examples include: submitting a form and allowing the automation to auto-reply, appointment reminders and more.
Automation re-entry is accomplished two-ways:
- Restart Automation action - this action is used at the end of an automation branch to indicate that the contact may re-enter the automation if they meet the trigger criteria again.
- Re-entry setting - The re-entry setting, which defaults to "Run once", enables a global setting to indicate that contacts my re-enter the automation if they meet the trigger criteria again.
If, in all cases, a contact should be valid to re-enter an automation the "Allow repeat" option is selected and the Restart Automation actions are unnecessary (but can be left).
If an automation is set to Run once, but uses a Restart Automation action they automation can be run through again. This configuration option provides a global setting while still honoring branch-level automation restart rules.
Exit an automation when a goal is achieved
Exit when a goal is achieved enables you to specify goals, that when they reached, automatically exit the contact from the automation (vs completing the automation).
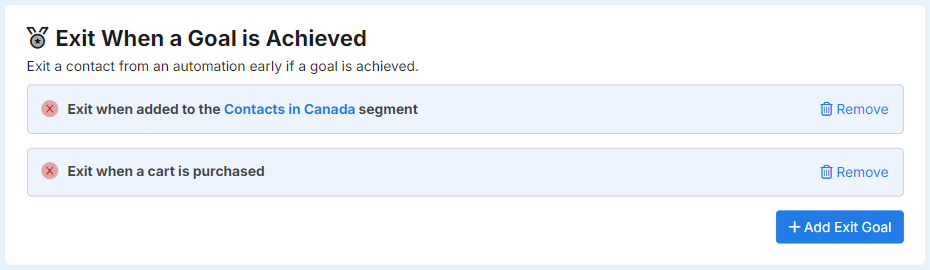
For example, when running an abandon cart automation you can exit a contact from that automation when they purchase their cart.
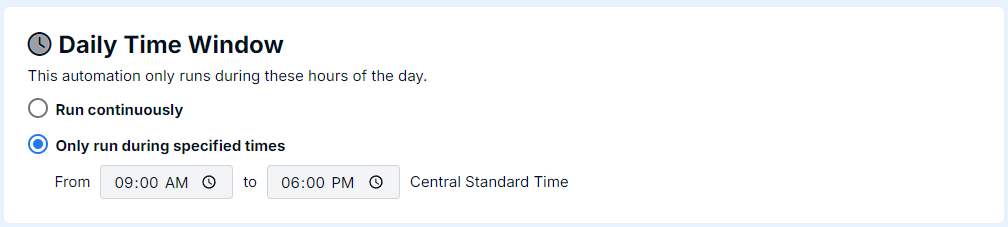
Daily Time Window
Automations can additionally be configured to run only during specific times of the day. For example, this is helpful to ensure SMS messages do not go out early in the am, or late in the pm. However, in most customer cases, it is recommended to run automations continuously.
Automation Schedule
Use the automation schedule to automatically enable an automation or disable an automation based on the date.
 Important
If an automation has a schedule and it not eligible to run, the automation automatically pauses.
You can set both the start and end date range or you can set individually. For example, you could set a future start date but leave the end date unset to automatically start an automation.
Advanced Settings
Using the choices available in advanced settings you can reset the automation. These options should be used with caution.
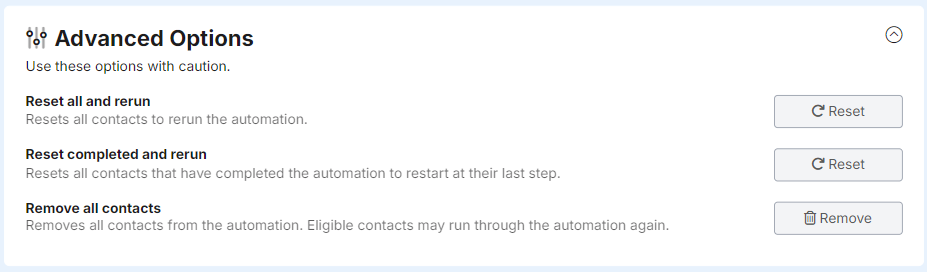
Reset all and rerun
Resets all contacts and reruns the automation. If contacts are in an automation they will restart from the beginning.
Reset completed and rerun
When contacts complete an automation, such as a drip campaign, this option allows you to reset the completed status. This is useful when you have modified an automation and want contacts to "restart" where they left off.
For example, if you have a drip campaign and decided to add another email or SMS. You can add the new action or condition to the automation and then "Reset Completed". Contacts that successfully completed the automation will restart and run through the new actions or conditions.
Remove all contacts
This hard-deletes all contacts that have run through the automation.