First Engaged 1 Year Anniversary
Show your customers you appreicate their loyalty with a simple Anniversary drip campaign. We'll walk you through an easy way to set up an Anniversary automation so you can 'set it and forget it!' Please note, in order to utilize this campaign/segment you have to be collecting the data field for whatever you want to celebrate (i.e. first product purchase, became a member, etc.).
RecommendedIn order to utilize this campaign and dynamic segment, you need to be integrated with your point-of-sale or CRM system. The segment relies on up-to-date purchase or visits records. See our Integrations Guide for help with connecting with other apps.
STEP ONE: Create a Dynamic Segment
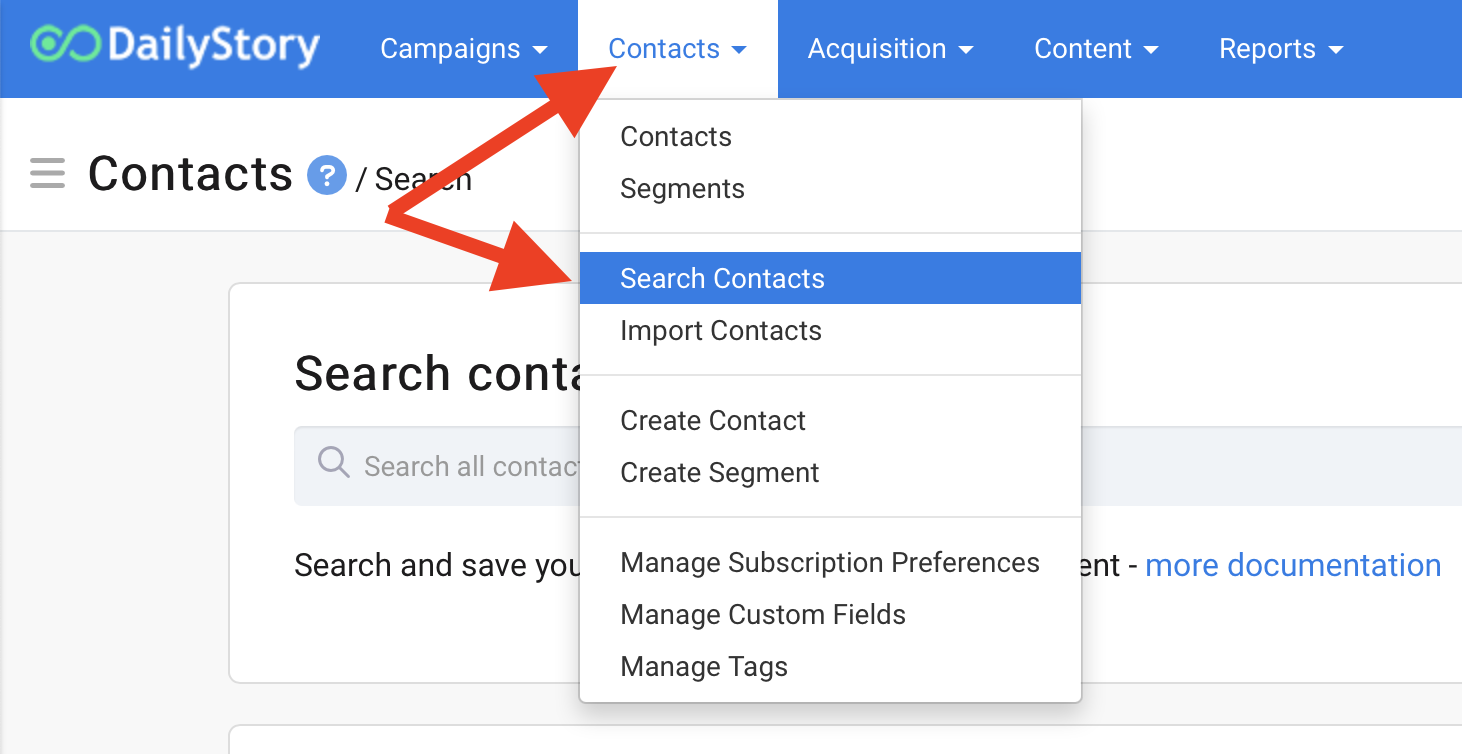
- Create a dynamic segment for your Anniversary Campaign. Go to
Contacts > Search Contacts
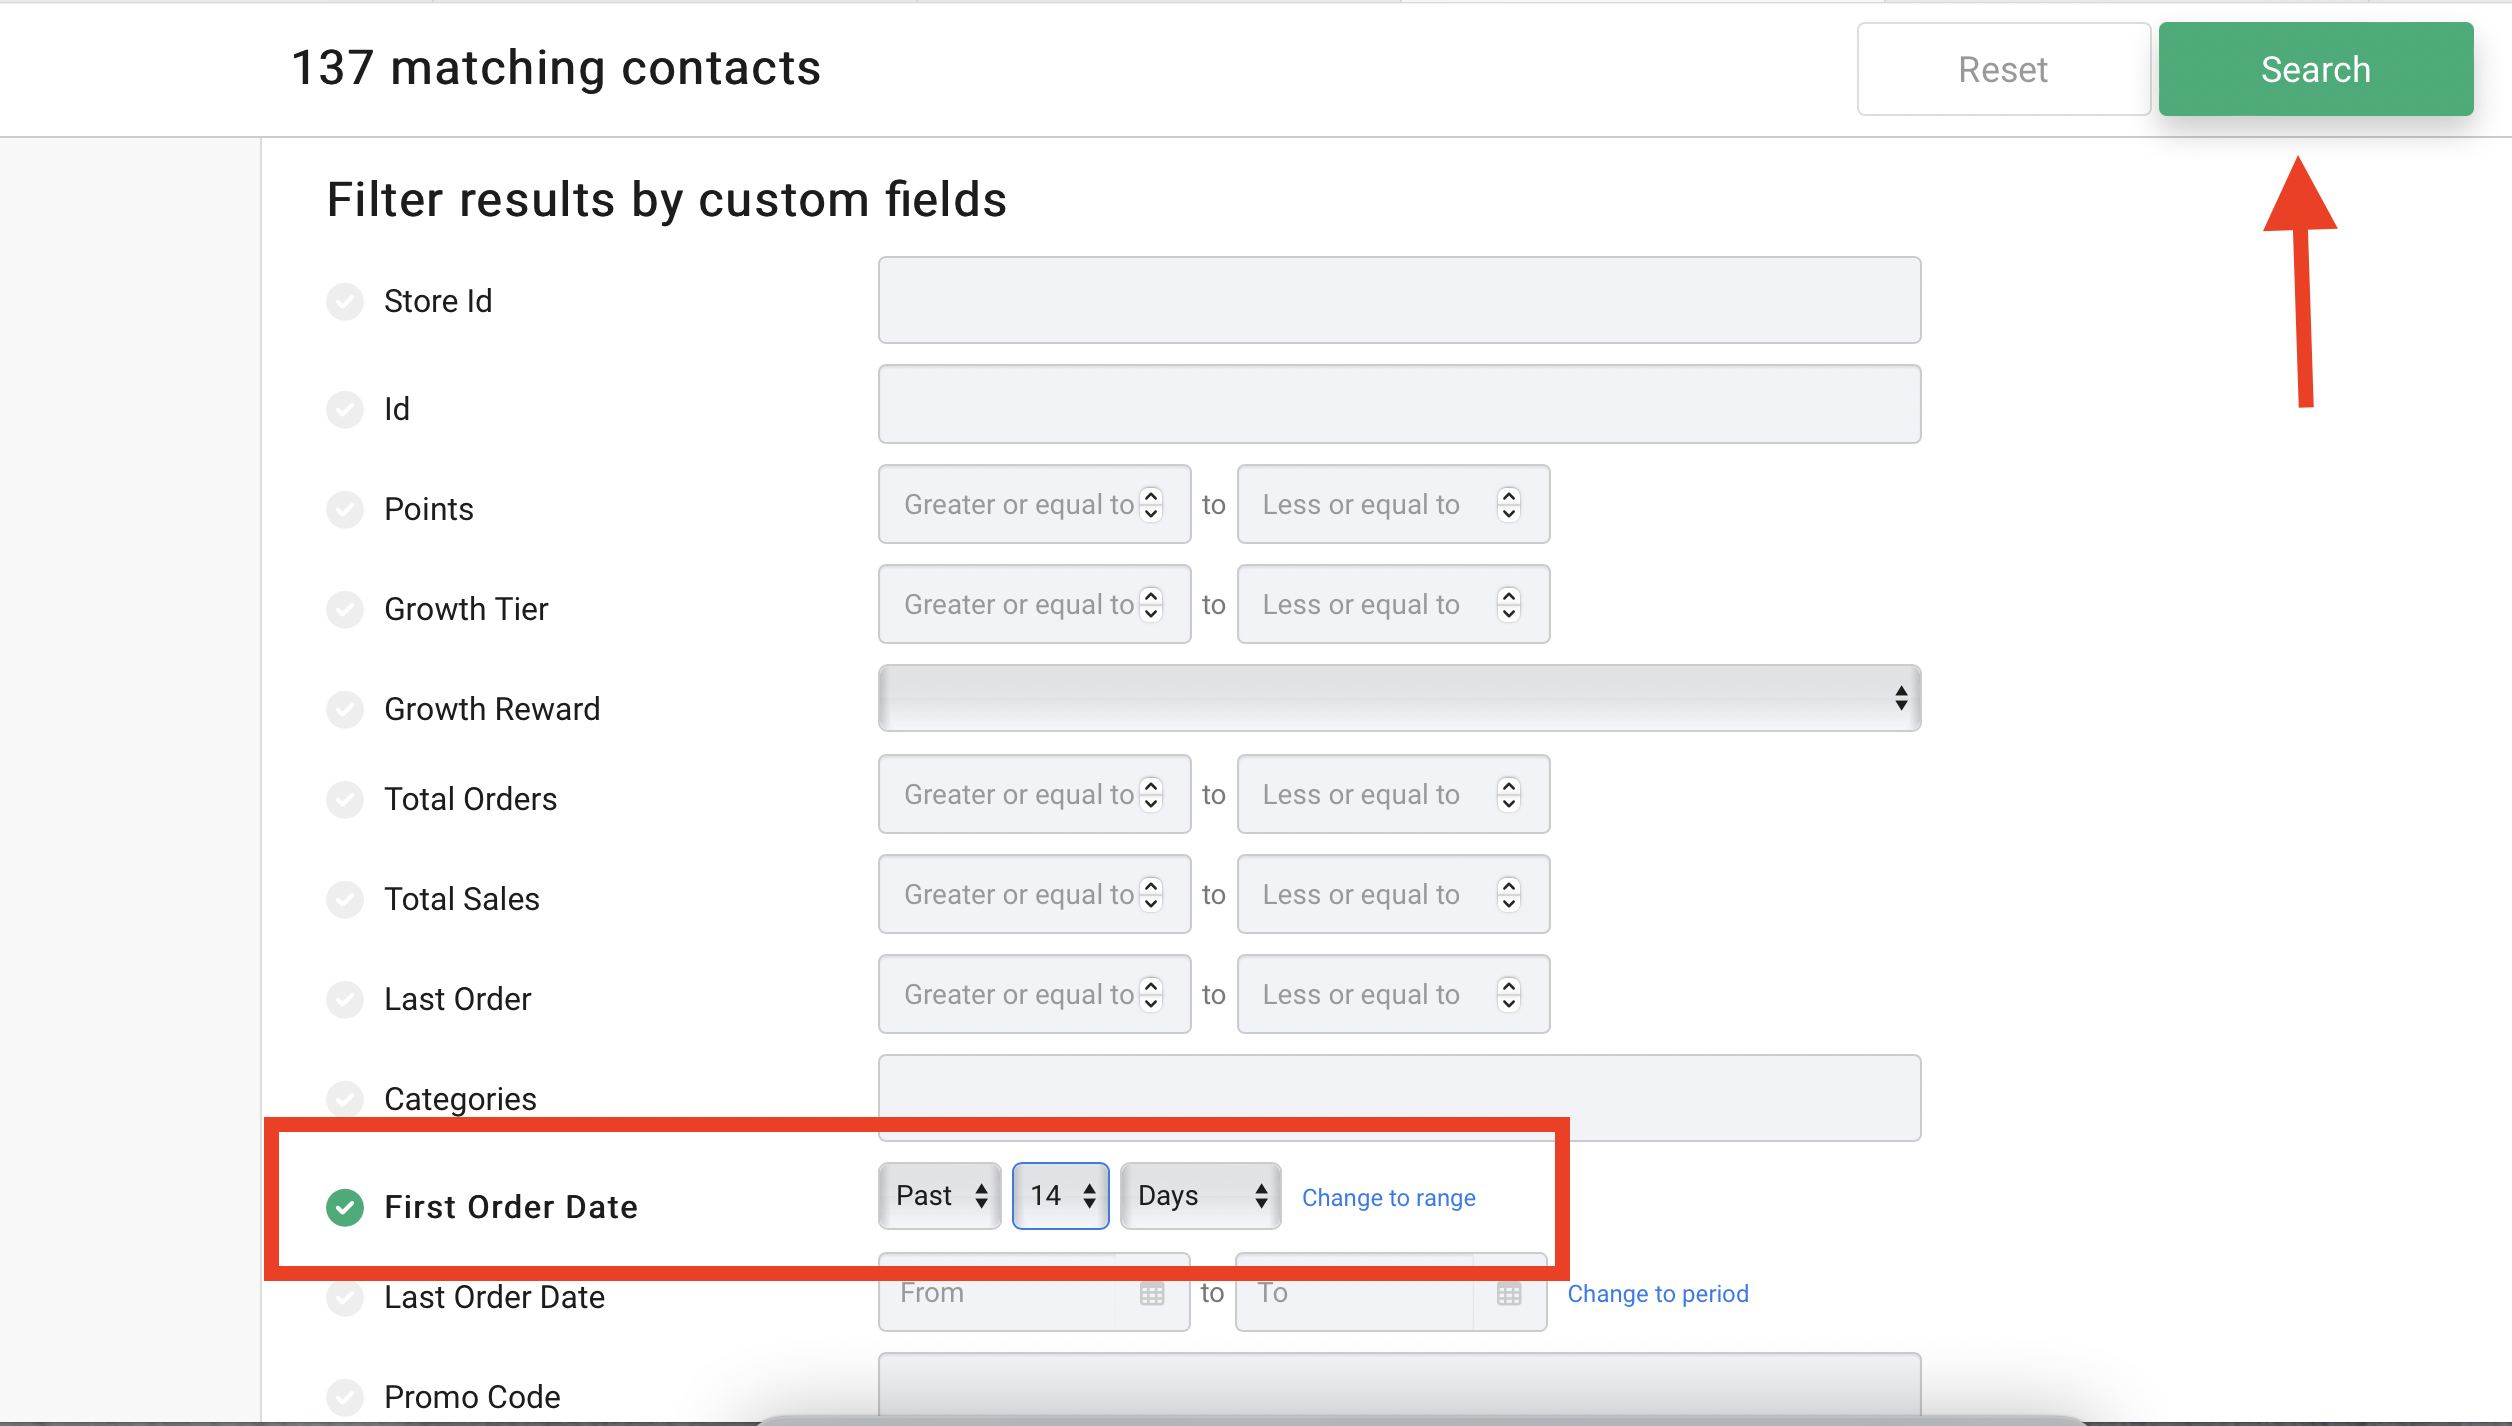
- Look for the filter search field you want to celebrate like "First Purchase" and change from Range to Period (you'll be celebrating their First Purchase or First Visit anniversary!). You can set this to be for the next 14 days, 10 days, 2 days...whatever date range you would like to begin sending texts &/or emails to your customers. Hit the green Search bar and Create Segment.
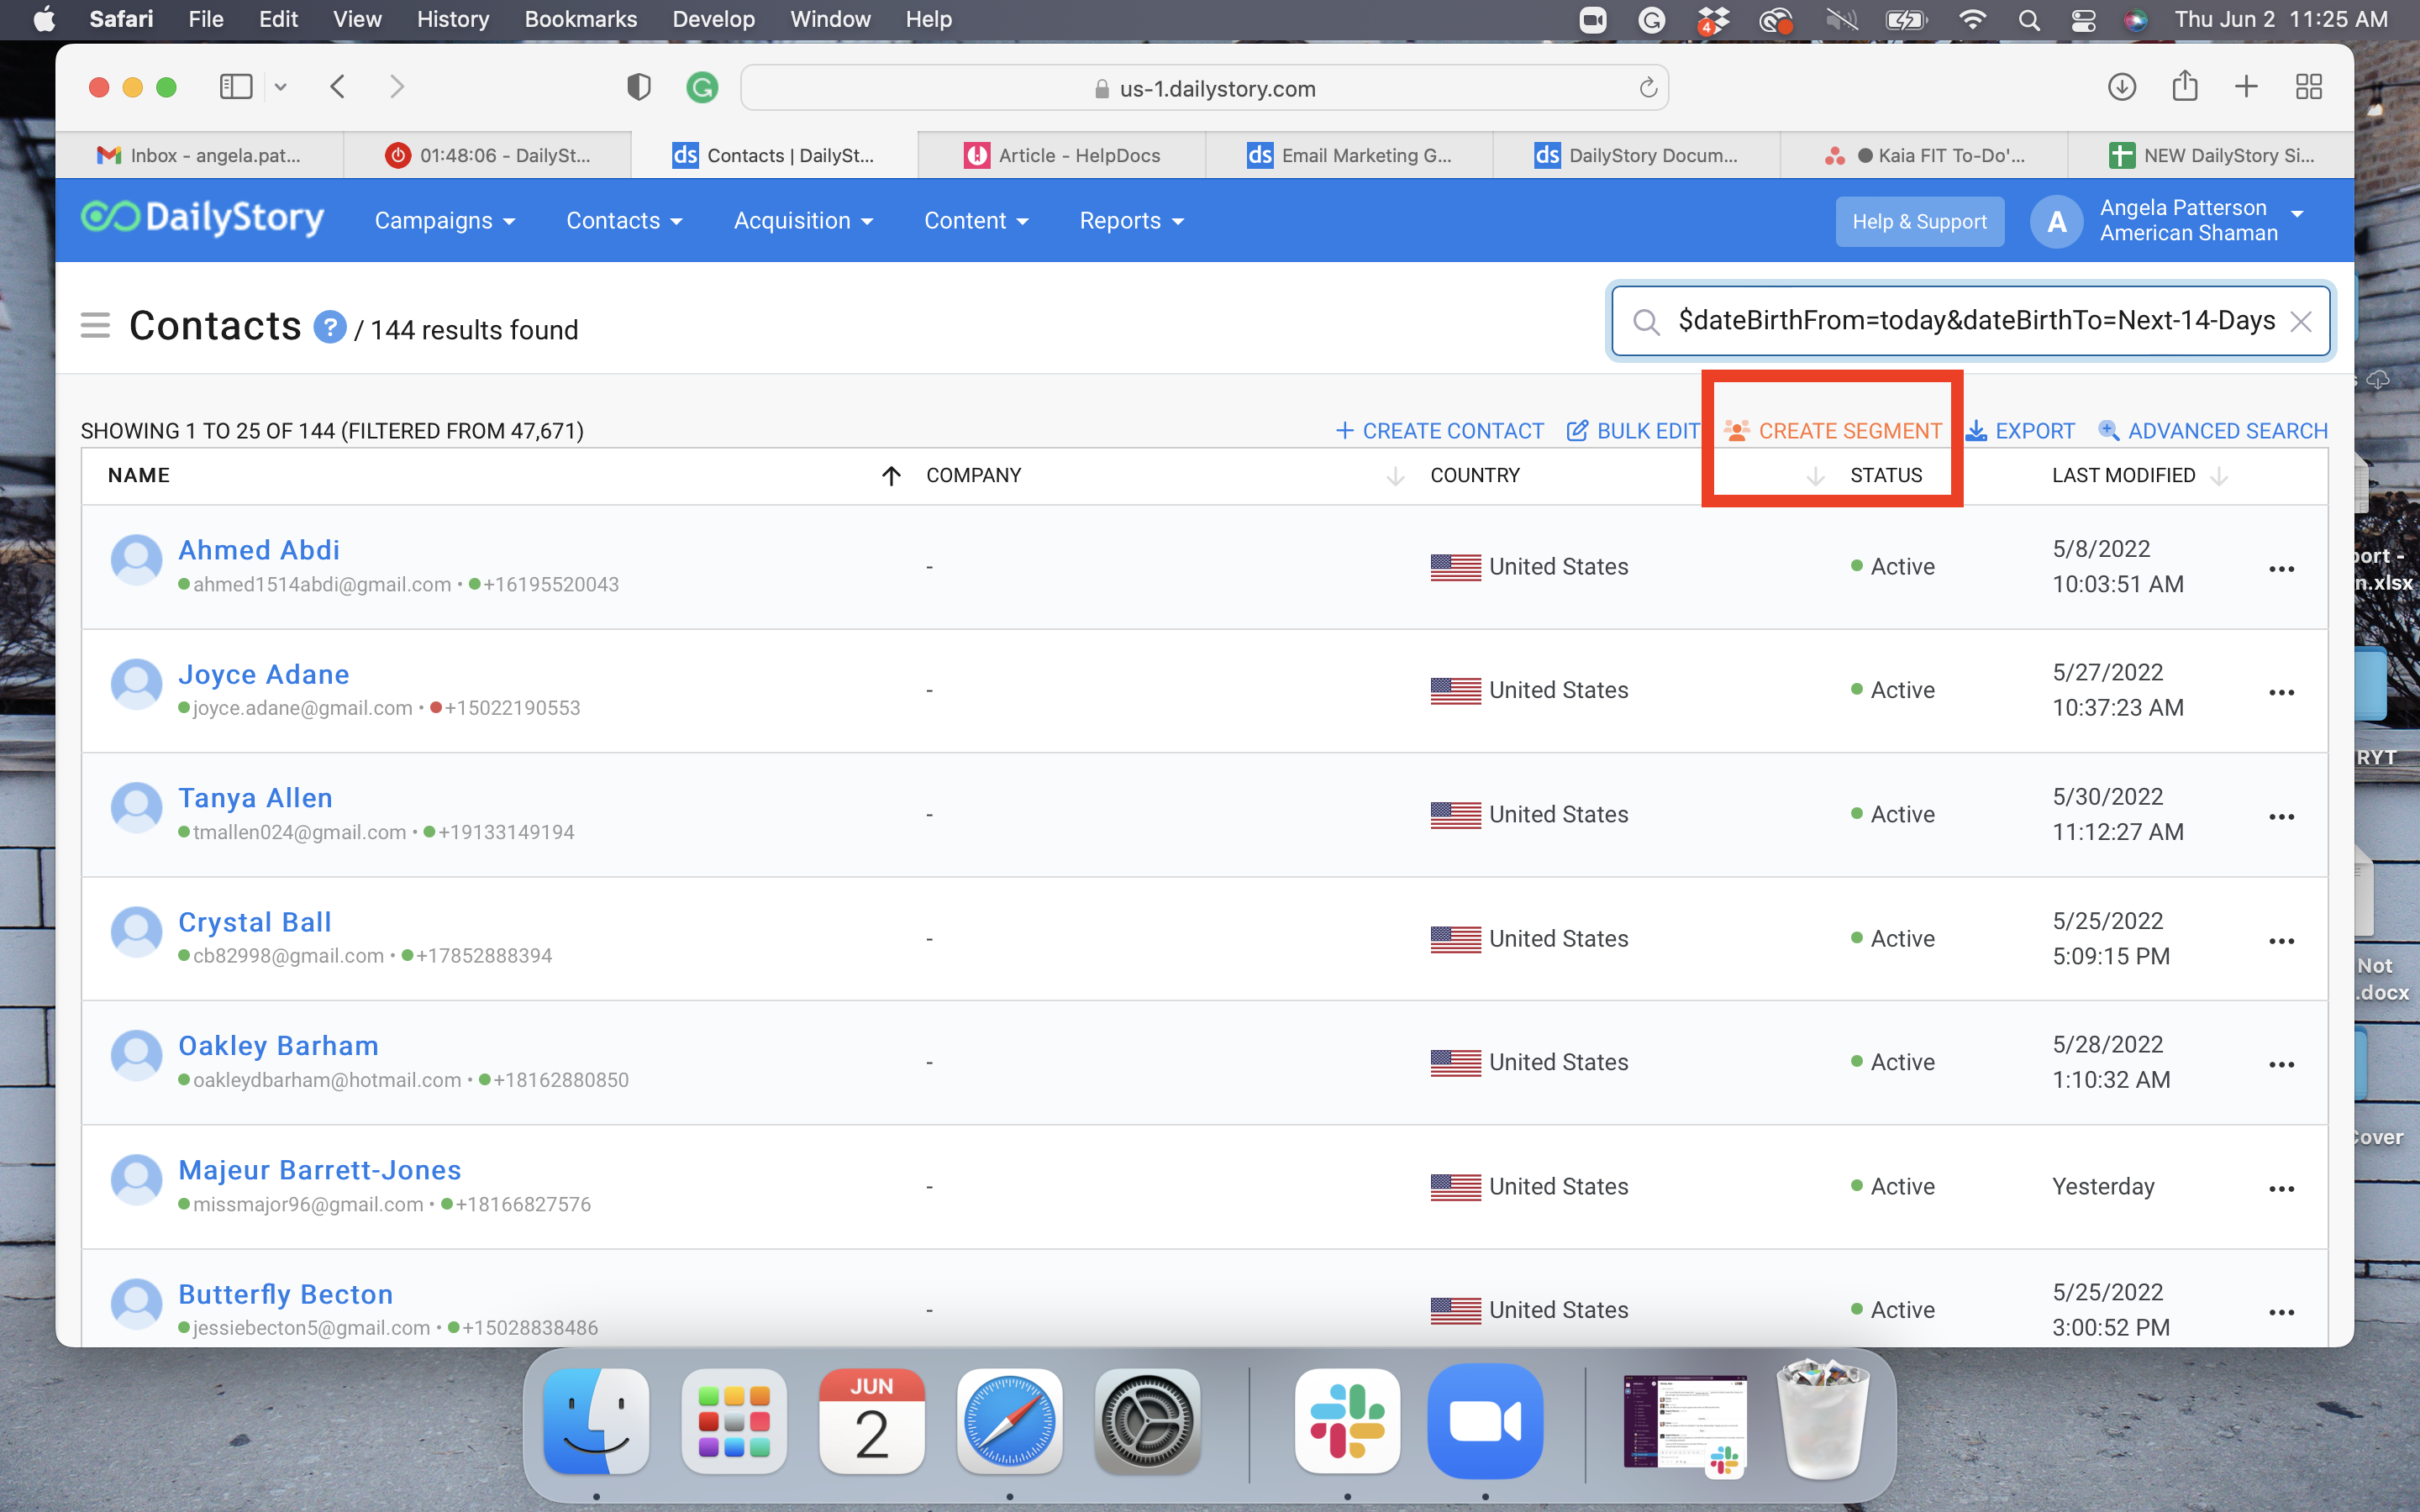
Click here for more help with creating and working with dynamic segments.
STEP TWO: Create a Campaign
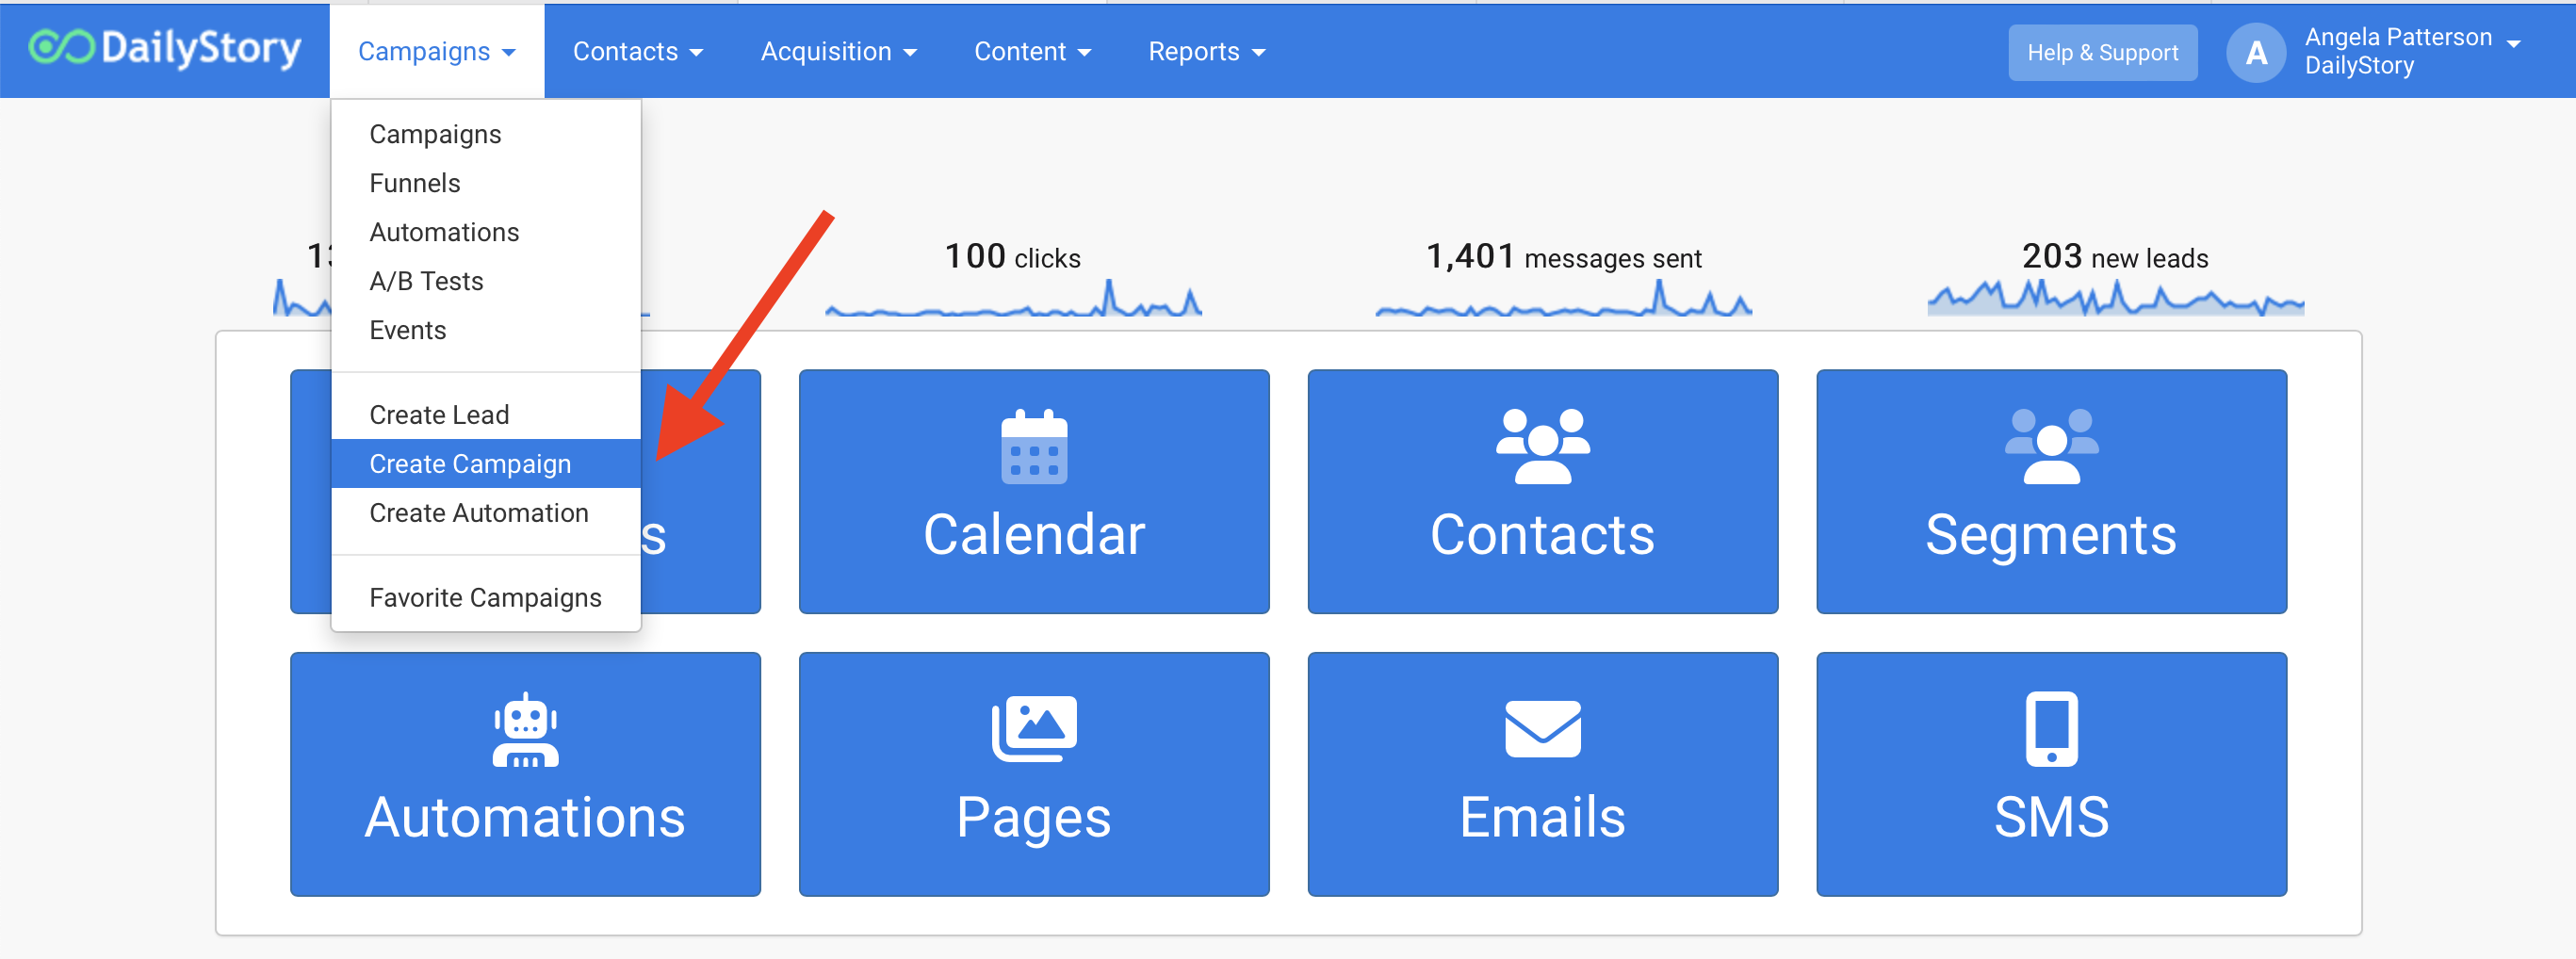
- Navigate to
Campaigns > Create Campaign - Name the campaign Anniversary Campaign. Click
Create Campaign.
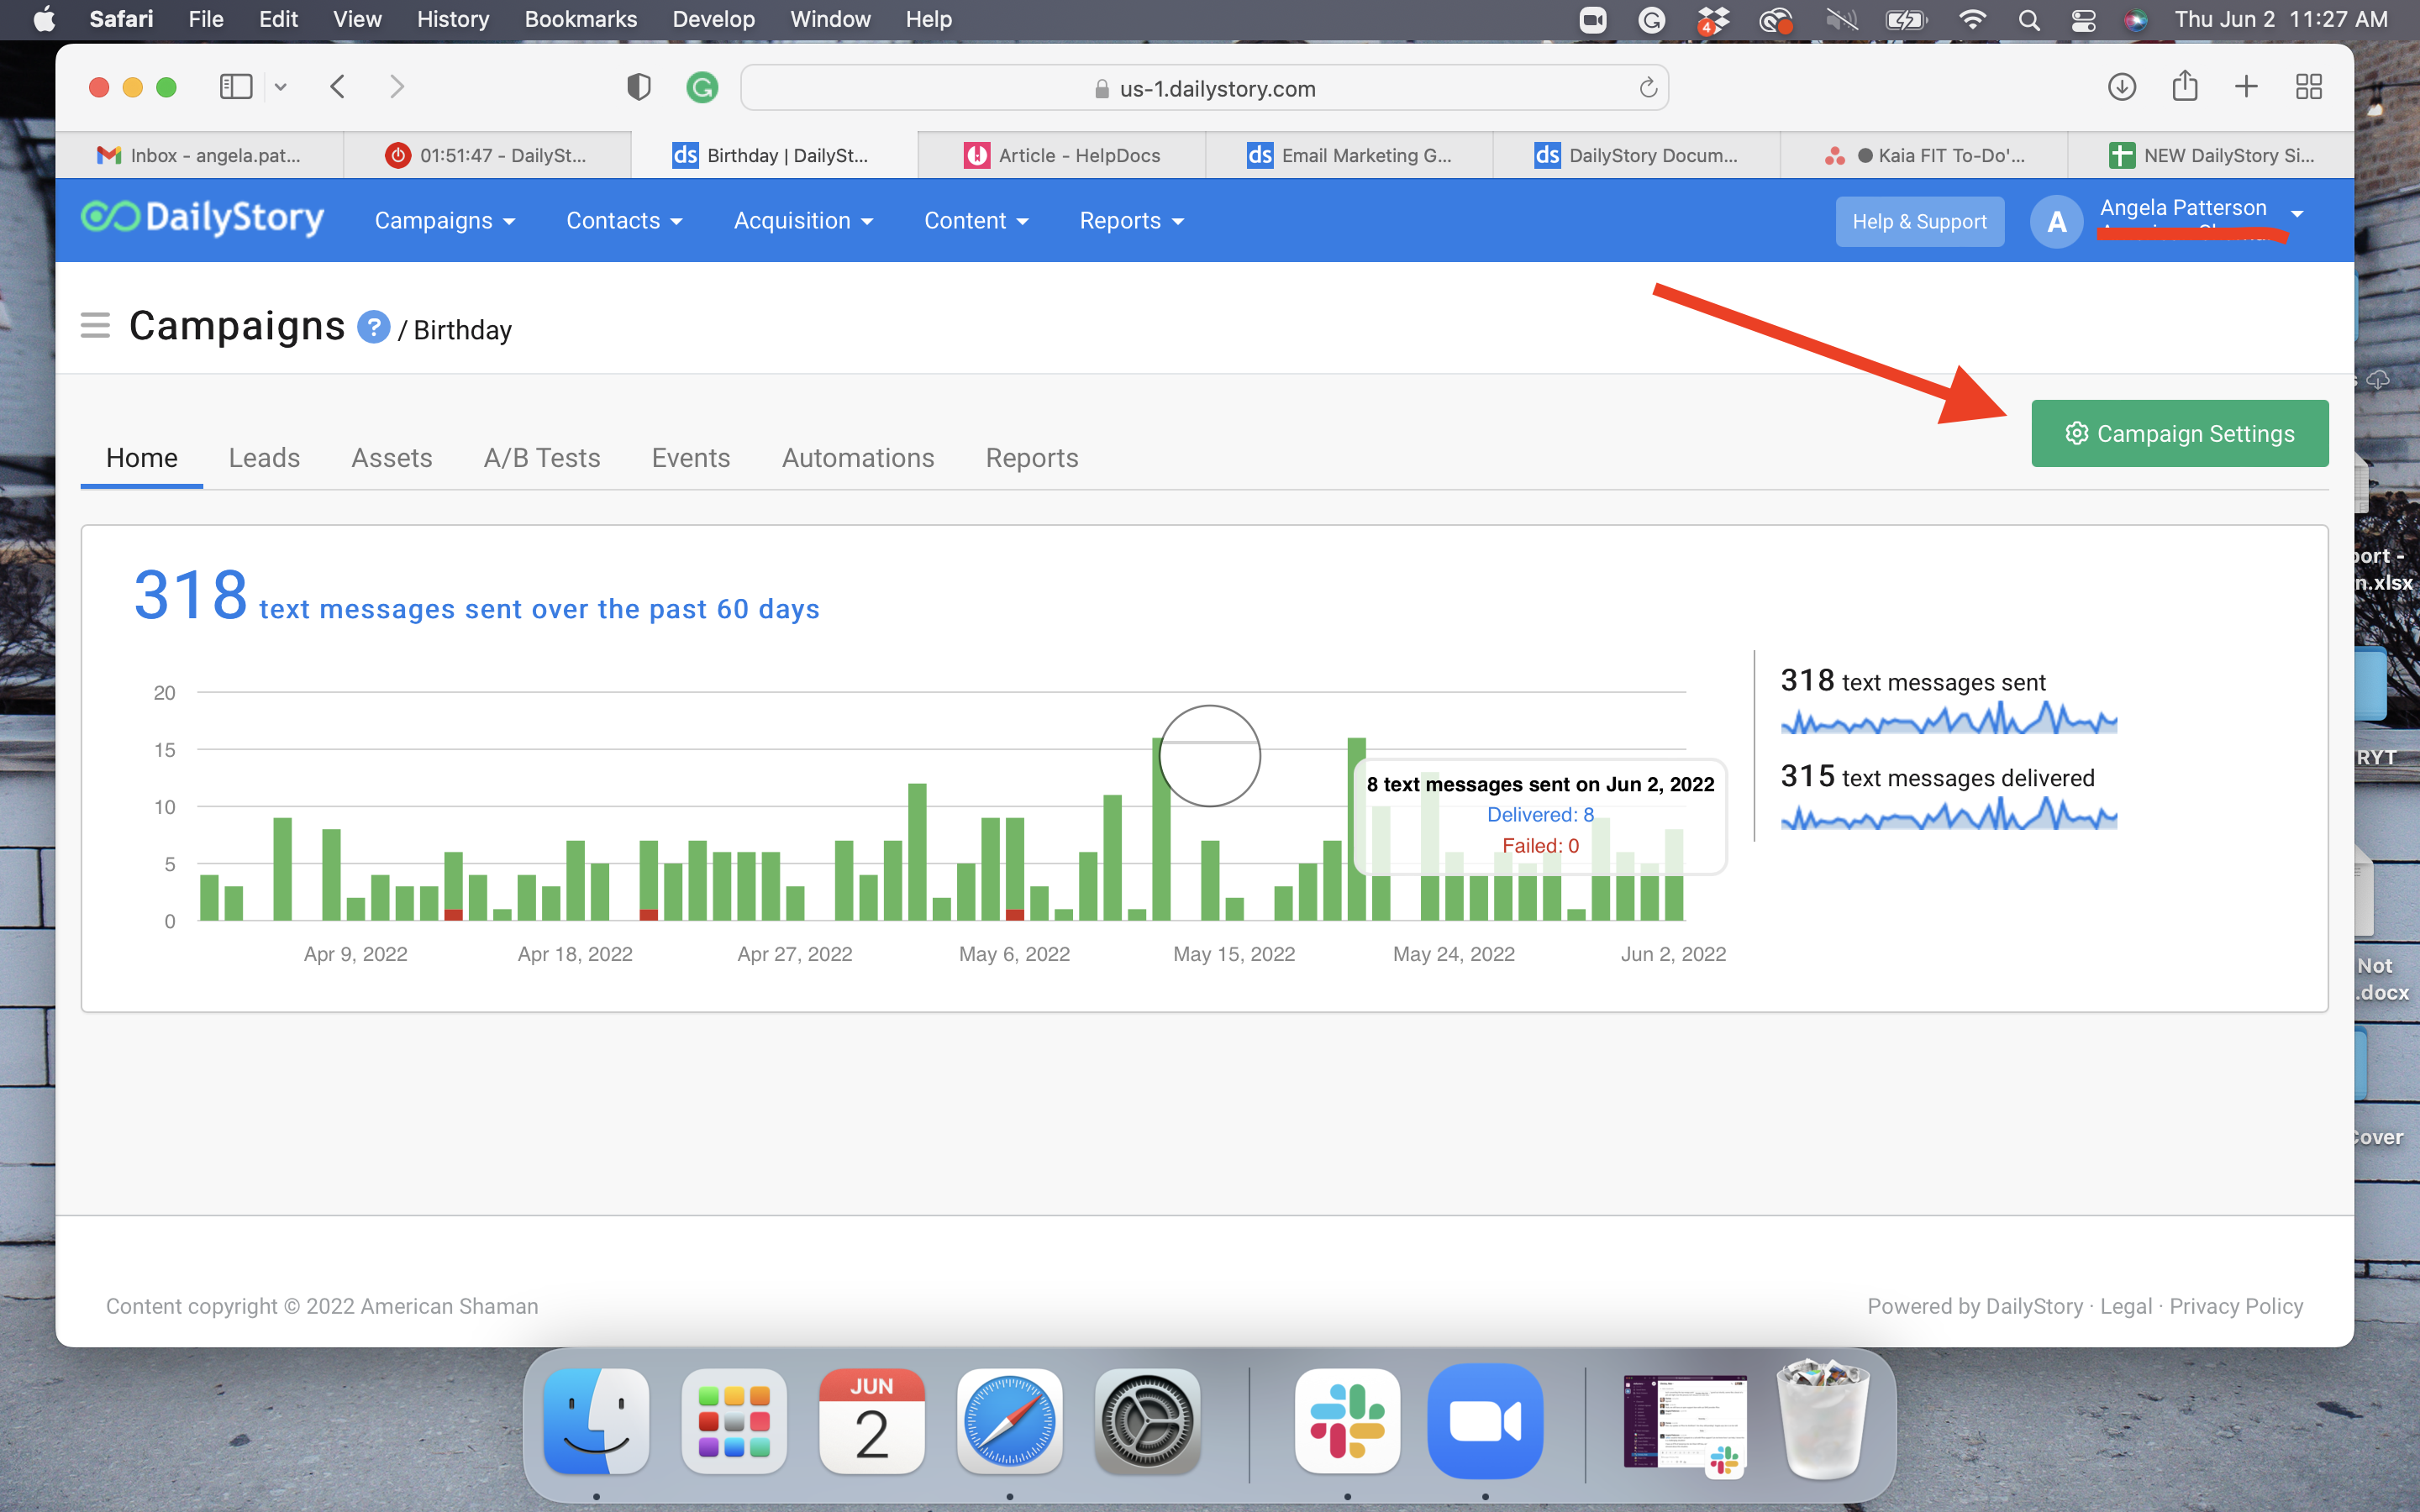
- From within the campaign, select 'Campaign Settings'.
- In the Segments box, select the segment you created in Step 1 from the drop-down list.
- Click
Save & Close.

Click here for more help with creating and working with Campaigns.
STEP THREE: Create a Happy Anniversary Email or Text Message
- From within the campaign, select the Assets tab and then click
+ Add Asset. - Create an email or text message for your customers to receive on their anniversary.
- Click
Save & Close.
Click here for more help with creating text messages or creating an email with the email designer.
STEP FOUR: Create Automation
- From within the campaign, select the automation tab and then click
+ Add Automation. - Name the automation Happy Anniversary Automated Message or whatever you like.
- From the Triggers tab, drag and drop the trigger When added to this campaign onto the canvas.
- From the Actions tab, drag and drop the action Send a text message or Send an email onto the canvas overlapping the previous step so it will drop into place. Select the text message or email to send and any restrictions on the day and time from the menu to the right.
- From the Triggers tab, drag and drop the trigger When time has passed onto the canvas overlapping the previous step. Select 3 days frome the drop down menu for time passed. Schedule out your follow-up assets and repeat as needed.
- From the Actions tab, drag and drop Remove from campaign onto the canvas overlapping the previous step. Select the campaign from the menu on the right.
We're removing them from the campaign so they can drip through it again next year. Once a contact becomes a lead in campaign they are removed by manually removing them or an automated step to remove them.
- Click
Save Changesfrom the top right of the screen and then click the back arrow next to the automation name.
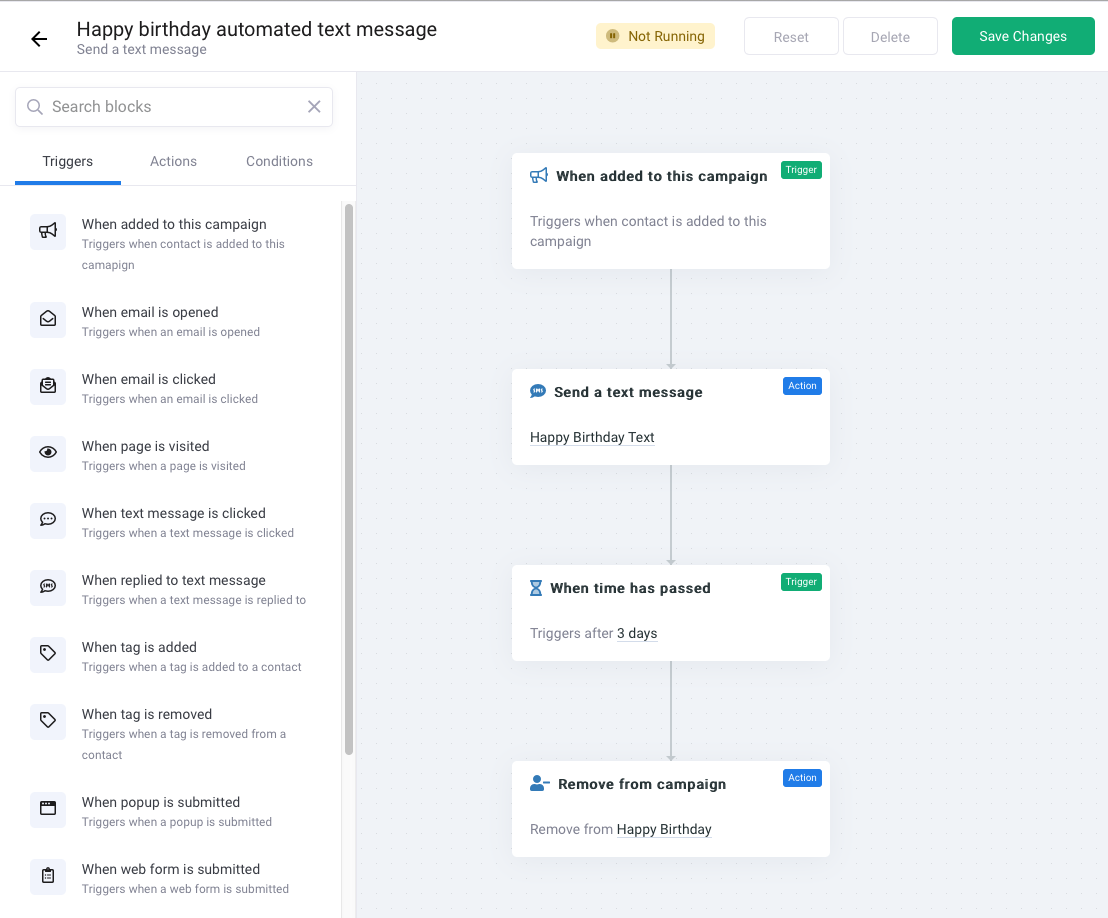
- Now, slide the button to enable the automation.

Click here for more help with creating automations.
You're all set!