Email Setup in 6 Steps
Just 6 Steps To Be Up and Running!
DailyStory brings process, consistency, and measurement to your digital marketing campaigns. We've put together this Quick Start Guide to help you get your email marketing up and running fast!
1. Enter your account details
There are several important account settings you'll need to setup before you get started. Navigate to your user menu in the top right hand corner to access your Account Settings.
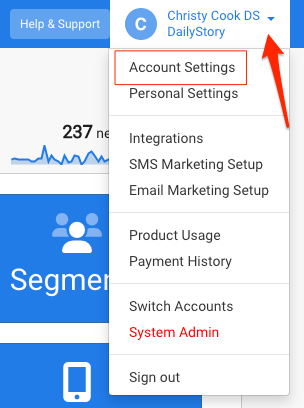
Account Settings Tab:
- Verify Account Name (upload your logo if you like).
- Verify Account Owner.
- Set the time zone for your company. This determines the time zone for scheduled content.
- Complete Company Contact Information and social media links. These will auto-populate for icon widgets and footers used in the designers.
- Add additional users
Personal Settings Tab:
- Add your email and mobile phone information for easy receiving of test messages.
For more information on all Account Settings and customizations, see our Account Settings Article.
2. Setup email marketing
To configure your email marketing, you'll just need to add a few DNS records. These help ensure that when DailyStory sends email on your behalf, email recipients can verify the authenticity of your email -- this helps ensure your email makes it to the inbox.
Follow this step-by-step process in the article, Setting up your email domain with DailyStory.
 Warning
Unless configured, email sent on your behalf by DailyStory will use one of DailyStory's email domains. This means that people that receive your email will see the message as coming from: Anna Jones <anna@example.com> on behalf of DailyStory
3. Add contacts
To run an email campaign, you'll first need to add your contacts.
There are several ways to add contacts to your DailyStory account. The most common way is to import a list. See our quick start article Bring In Your Contacts or get a step by step walk through on importing.

4. Create your first campaign
Campaigns are a cornerstone feature of DailyStory. Everything in DailyStory is associated back to a campaign.
On the Campaigns drop-down menu, select Create Campaign.

All you need to create a campaign is a Name and Target Audience. See the article Creating a Campaign for more details on all of the campaign settings and adding contacts to a campaign.
- Name—enter the name of the campaign. The name is a required field.
- Target Audience—select which segments (group of contacts) will be assigned to the campaign. When you created your account, there was a Dynamic Segment created for you complimentary called "All Contacts". You can choose this segment in Existing Contacts if you will be targeting all of the contacts in your system.Choose Inbound leads if you will be bringing in new contacts from a form, popup or keyword.

For a more detailed explanations on campaigns and segments, see our DailyStory Campaigns Guide and DailyStory Segments Guide.
5. Create your first email
To add an email click on the Assets tab and then click on + Add Asset and then select Add an Email.

The mandatory fields to create your email is Name, Subject and From (sender). The description and inbox preview text are optional (although we highly encourage you to utilize the inbox preview text). See our Emails Marketing Guide for more information.
From here you can start crafting your email in the Email Designer and then return to the Settings whenever you are ready to schedule it! For more information on scheduling an email see Scheduling an Email.
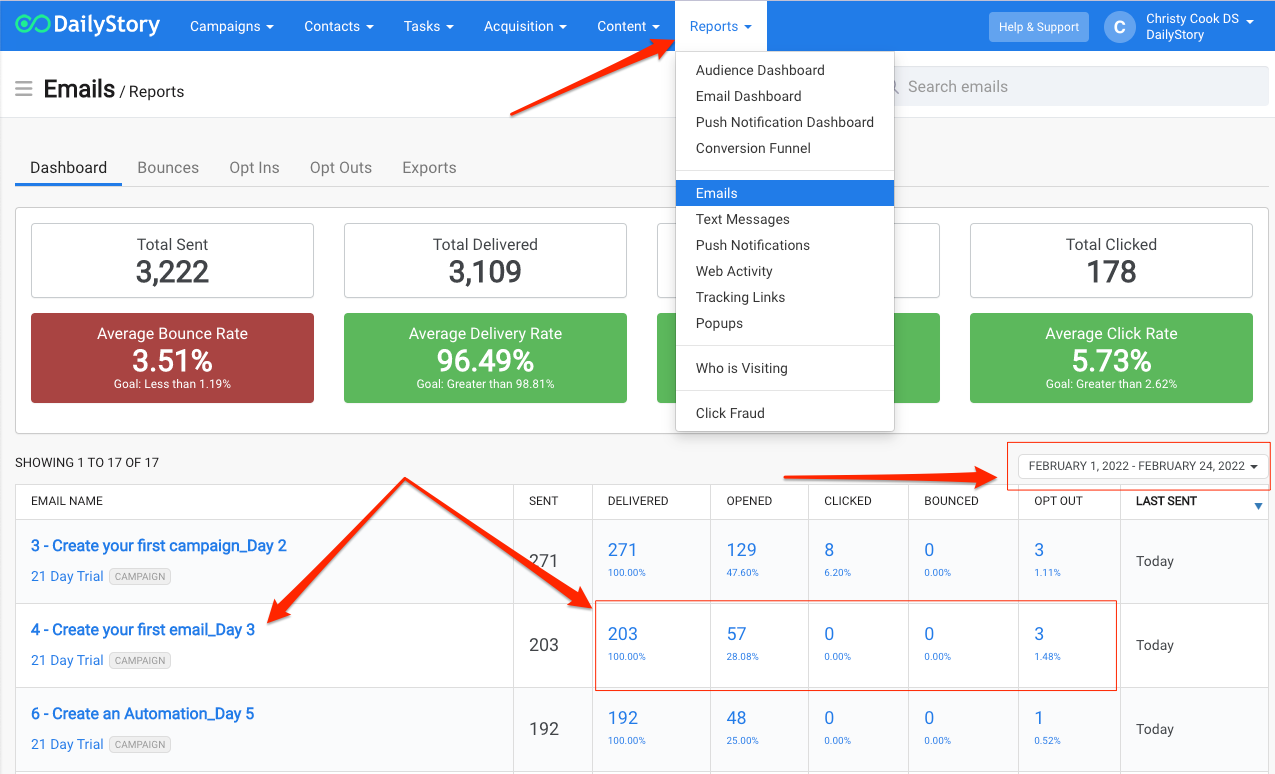
6. Track your results
To see the reporting metrics for your email, navigate to Reports > Email. This will take you to an all email reports dashboard and list where you can dive into individual reports and refine by time frame.